


2
Connect Equipment and Power to the UPS
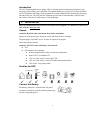
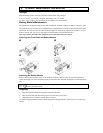
1. Connect equipment to the UPS.
Note: A laser printer draws significantly more power than other types of equipment and
may overload the UPS.
2. Add accessories to the Smart-Slot (optional).
3. Connect ground leads to the TVSS screw (optional). To make the connection, loosen the screw
and connect the surge suppression device ground lead. Tighten the screw to secure the lead.
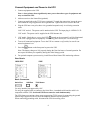
4. Plug the UPS into a two-pole, three-wire, grounded receptacle only. Avoid using extension
cords.
100V/120V models: The power cord is attached to the UPS. The input plug is a NEMA 5-15P.
230V model: The power cord is supplied in the UPS literature kit.
5. 120V model: Check the site wiring fault LED
located on the rear panel. It will be illuminated
if the UPS is plugged into an improperly wired utility power outlet (see Troubleshooting).
6. Turn on all connected equipment. To use the UPS as a master on/off switch, be sure all con-
nected equipment is on.
7. Press the
button on the front panel to power the UPS.
Note: The battery charges to 90% capacity during the first four hours of normal operation. Do
not expect full battery run capability during this initial charge period.
8. For optimal computer system security, install PowerChute Smart-UPS monitoring software.
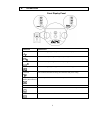
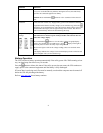
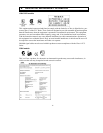
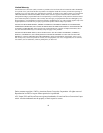
Rear Panels
100V/120V 230V
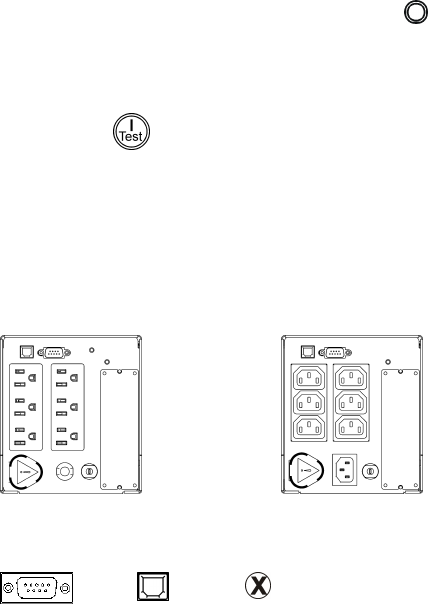
Basic Connectors
Serial Port
USB Port
TVSS Screw
Use only interface kits approved by APC.
Use only the supplied cable to connect to the Serial Port. A standard serial interface cable is in-
compatible with the UPS. Serial and USB Ports cannot be used simultaneously.
The UPS features a transient voltage surge-suppression (TVSS) screw for connecting the ground
lead on surge suppression devices such as telephone and network line protectors.
When connecting grounding cable, disconnect the UPS from utility power.