22 ASUS CUW-RM User’s Manual
3. HARDWARE SETUP
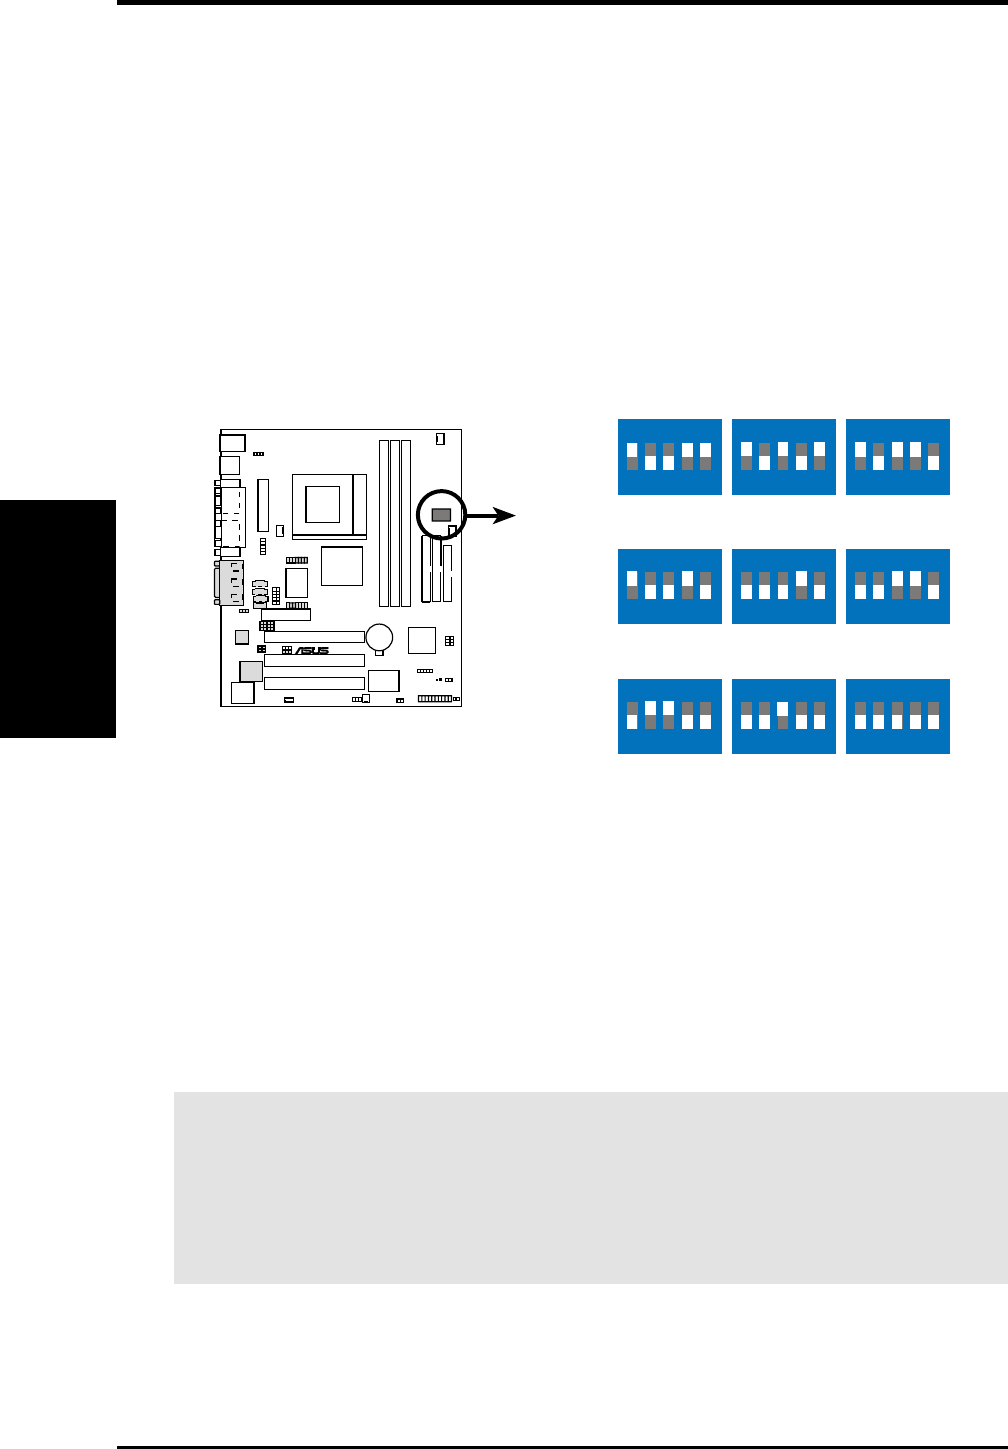
7) CPU External Frequency Setting (DSW)
This option tells the clock generator what frequency to send to the CPU, DRAM,
and the PCI bus. This allows the selection of the CPU’s External frequency. The
CPU External Frequency multiplied by the Frequency Multiple equals the CPU’s
Internal frequency (the advertised CPU speed). NOTE: You may set the memory
speed independently from the CPU External Frequency. Depending on your
memory type, select the appropriate “SDRAM” speed along with the appropri-
ate “CPU” speed.
IMPORTANT: When JumperFree mode is enabled, use BIOS setup in place of
these switches (see CPU Speed in 4.4 Advanced Menu). Only selected switches
are illustrated, see the next page for a complete frequency listing.
NOTE: In JumperFree mode, all DIP switches (DSW) must be set to OFF.
®
CUW-RM
CUW-RM CPU External Clock
Frequency Selection
DSW
CPU
SDRAM
→
→
75MHz
112MHz
83MHz
124MHz
66MHz
100MHz
ON
12345
ON
12345
ON
12345
CPU
SDRAM
→
→
100MHz
100MHz
112MHz
112MHz
100MHz
150MHz
ON
12345
ON
12345
ON
12345
CPU
SDRAM
→
→
133MHz
133MHz
150MHz
150MHz
124MHz
124MHz
ON
12345
ON
12345
ON
12345
(JumperFree Mode)
NOTE: Frequency Multiple settings are not available here because usually
Socket 370 processors have locked Frequency Multiples. If your Socket 370
processor does not have a locked Frequency Multiple, you must use CPU
Core:Bus Freq. Multiple in 4.4 Advanced Menu of the BIOS setup to set the
Frequency Multiple. If the Frequency Multiple is locked, setting the Frequency
Multiple in BIOS setup will have no effect.
WARNING! CPU frequencies above 66MHz exceed the specifications for cur-
rent Celeron processors and are not guaranteed to be stable. For Coppermine pro-
cessors, CPU frequencies other than the recommended bus frequencies are not
guaranteed to be stable. Premature wearing of the processor may result when
overclocking. Be sure that the DIMM you use can handle the specified SDRAM
MHz or else bootup will not be possible.
Motherboard Settings
3. H/W SETUP


