


ASUS NCLV-D SeriesASUS NCLV-D Series
ASUS NCLV-D SeriesASUS NCLV-D Series
ASUS NCLV-D Series
2-192-19
2-192-19
2-19
2.4.32.4.3
2.4.32.4.3
2.4.3
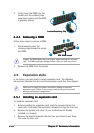
Installing a DIMMInstalling a DIMM
Installing a DIMMInstalling a DIMM
Installing a DIMM
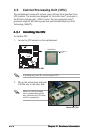
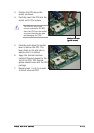
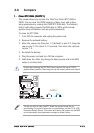
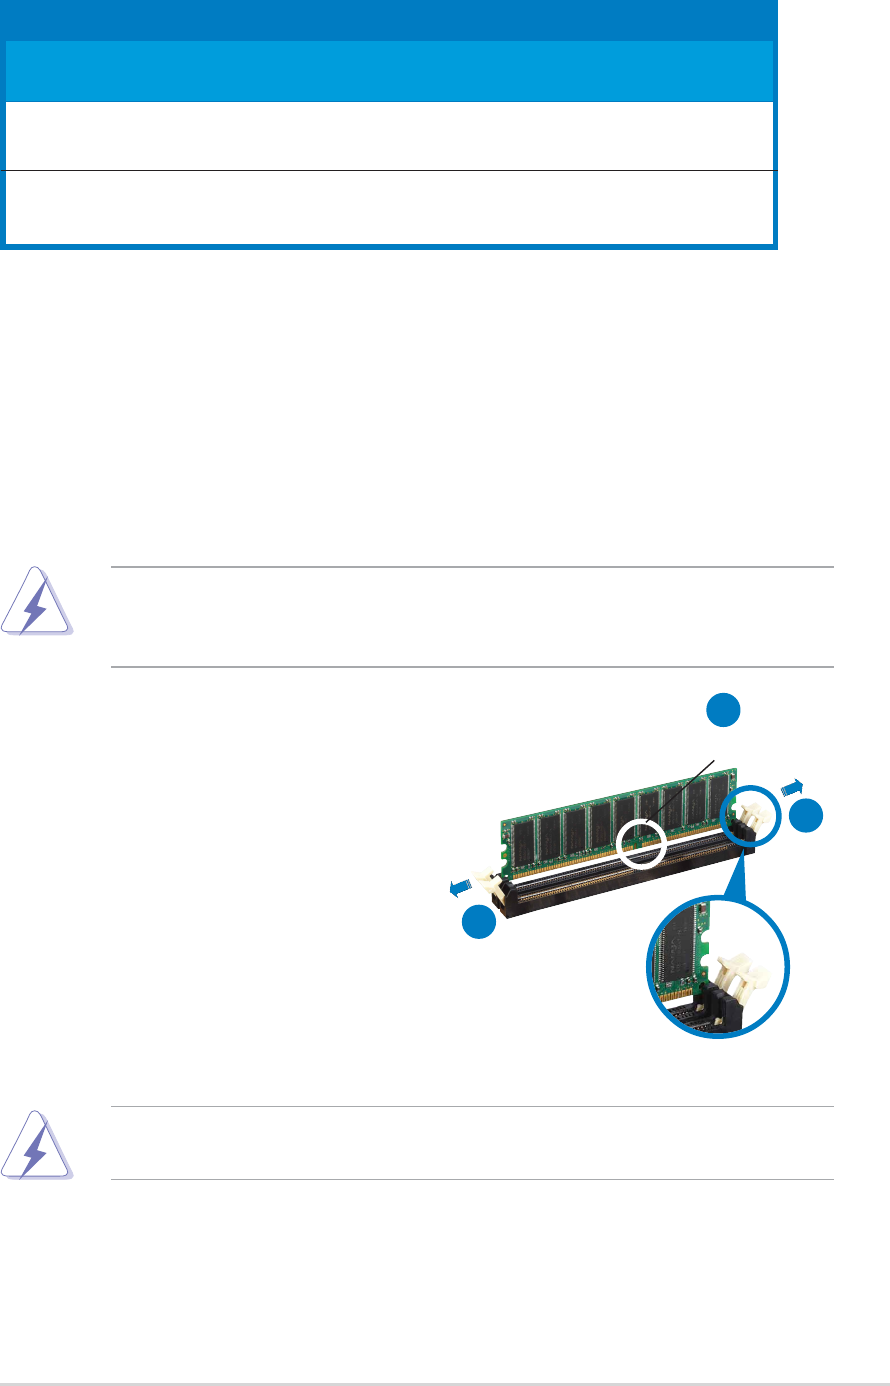
1. Unlock a DIMM socket by
pressing the retaining clips
outward.
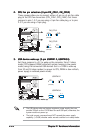
2. Align a DIMM on the socket such
that the notch on the DIMM
matches the break on the
socket.
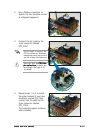
Make sure to unplug the power supply before adding or removing DIMMs
or other system components. Failure to do so may cause severe damage
to both the motherboard and the components.
A DDR DIMM is keyed with a notch so that it fits in only one direction.
DO NOT force a DIMM into a socket to avoid damaging the DIMM.
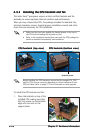
Unlocked retaining clipUnlocked retaining clip
Unlocked retaining clipUnlocked retaining clip
Unlocked retaining clip
DDR DIMM notchDDR DIMM notch
DDR DIMM notchDDR DIMM notch
DDR DIMM notch
1
2
1
* For dual-channel configuration, you may:
• install
identical identical
identical identical
identical DIMMs in all four sockets, or
• install
identical identical
identical identical
identical (the same type and size) DIMM pair in DDR_B2 and
DDR_A2 (blue sockets) only.
Recommended memory configurationsRecommended memory configurations
Recommended memory configurationsRecommended memory configurations
Recommended memory configurations
SocketsSockets
SocketsSockets
Sockets
ModeMode
ModeMode
Mode
DDR_B2DDR_B2
DDR_B2DDR_B2
DDR_B2
DDR_A2DDR_A2
DDR_A2DDR_A2
DDR_A2
DDR_B1DDR_B1
DDR_B1DDR_B1
DDR_B1
DDR_A1DDR_A1
DDR_A1DDR_A1
DDR_A1
(blue)(blue)
(blue)(blue)
(blue)
(blue)(blue)
(blue)(blue)
(blue)
(black)(black)
(black)(black)
(black)
(black)(black)
(black)(black)
(black)
Single-channel (1) Populated — — —
(2) — Populated — —
Dual-channel
*
(1) Populated Populated — —
(2) Populated Populated Populated Populated