ASUS P4B533-V motherboard user guide
2-11
2.5.2 Memory configurations
2.5.3 Installing a DIMM
Make sure to unplug the power supply before adding or removing
DIMMs or other system components. Failure to do so may cause
severe damage to both the motherboard and the components.
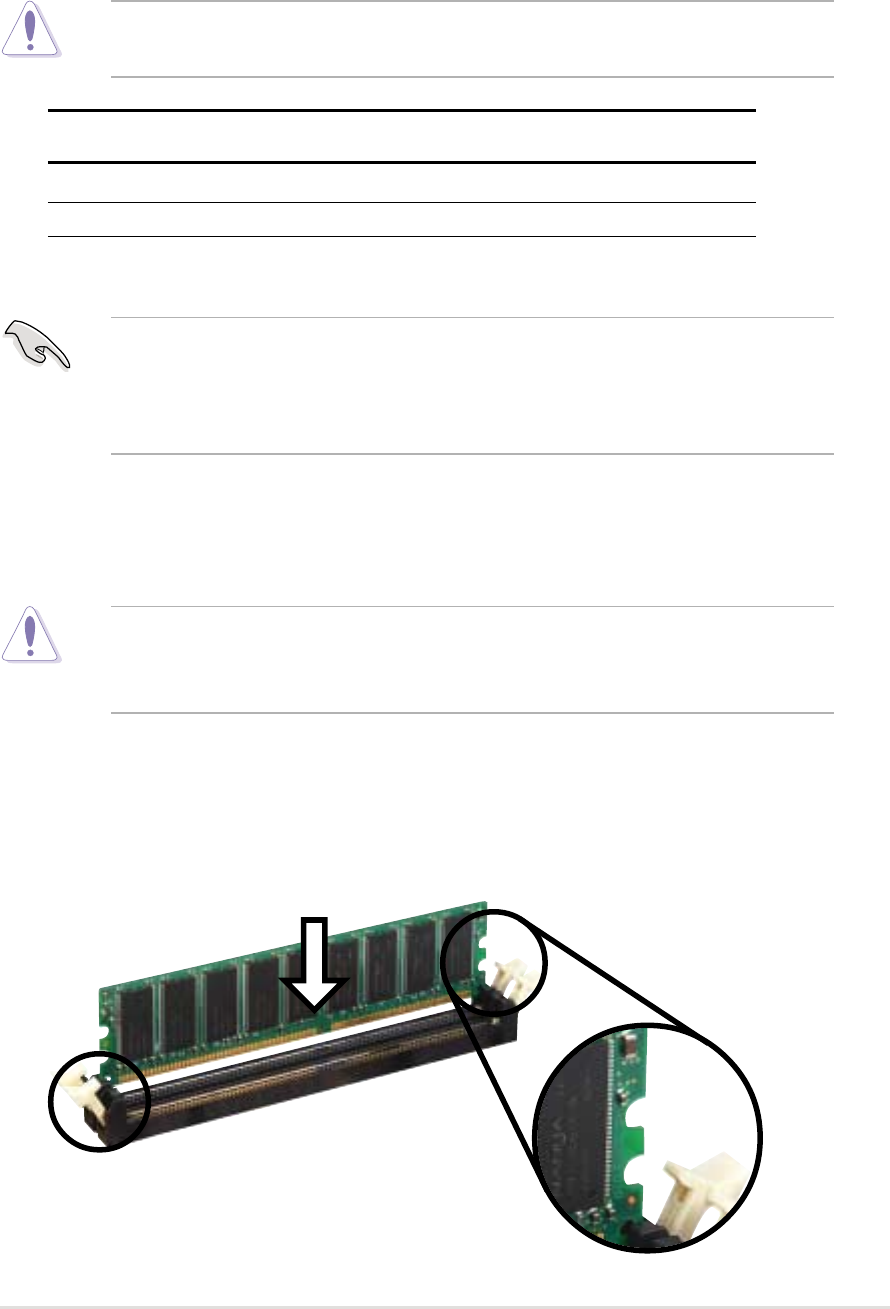
Follow these steps to install a DIMM.
1. Unlock a DIMM socket by pressing the retaining clips outward.
2. Align a DIMM on the socket such that the notch on the DIMM matches
the break on the socket.
You may install any DDR DIMMs with 64MB, 128MB, 256MB, 512MB, and
1GB densities into the DIMM sockets.
DDR DIMM1 DDR DIMM2 DDR DIMM3
(Rows 0&1) (Rows 2&3) (Rows 3&2)
SS/DS DS None
SS/DS SS SS
* SS - Single-sided DIMM
DS - Double-sided DIMM
DDR DIMM sockets 2 and 3 share the same rows, so if you install a
double-sided DIMM into DIMM2 socket, you must leave DIMM3 socket
empty. However, you may install single-sided DIMMs into DIMM2 and
DIMM3 sockets at the same time.
Use only the following combinations to install DDR DIMMs. Otherwise,
the system may not boot up.
Unlocked Retaining Clip


