


6
ASSIGNING PRE-INSTALLED PRINTERS TO
THE BELKIN AutoSwitch VIRTUAL PORTS
• If you are trying to add your printers to Windows® and it is not listed in the default Add Printer Wizard, you will have to use the
software that came with your printer to install the printer. Follow the instructions that came with your printer, then REBOOT your
computer.
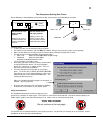
• If your printers are already installed in Windows®, all
you have to do is to change the port assignment from
LPT1 (or any other LPT port) to the virtual autoswitch
ports.
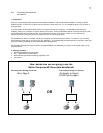
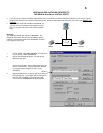
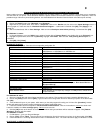
Example:
You installed a DeskJet and LaserJet in Windows®. The
DeskJet is connected to Port A of the AutoSwitch, and the
LaserJet is connected to Port B of the AutoSwitch, as shown
in the diagram on the right.
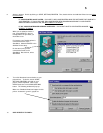
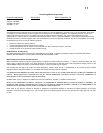
1. Click on START, SETTINGS, PRINTERS, and right-click
on your printer. Select PROPERTIES.
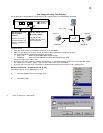
2. Click on the DETAILS tab above. You will see the
Window on the right.
Click on this pull-down menu to select which port your
printer is connected to. Choose AUTOLPTA, because
our example had the DeskJet on Port A of the
AutoSwitch.
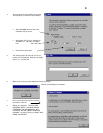
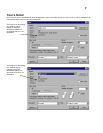
3. Repeat procedure from #1 above, and do the same for
the second printer. Our example has the LaserJet on
Port B on the AutoSwitch, so the port that it will
connect to in the PROPERTIES will be AUTOLPTB.
C
A B
F1U109
DeskJet LaserJet