


26
2003 Bontrager Service Manual
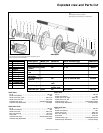
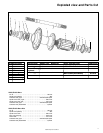
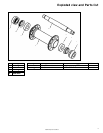
Pro front hub
2002 Bontrager Race Lite ATB, Race Lite 29, Race X Lite and Race X Lite Carbon front wheels, 2003 Race X Lite Aero
Recommended tools
Long bearing press
Short bearing press
Multi-purpose grease
Bench vise
Axle vise
Hammer, soft faced
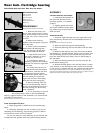
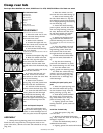
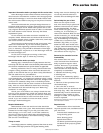
DISASSEMBLY
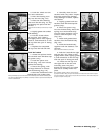
1. Loosen both end caps by
rotating them in opposite direc-
tions with your fingers.
2. Clamp the axle end cap
(either side) in the axle vise
(avoid over tightening).
3. Pull the wheel upward
(Fig. 1J) to remove the end cap
held by the vise.
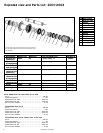
4. Tap the axle out of the
hub with the hammer (Fig. 2J).
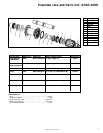
5. Slide the bearing off the
axle (Fig. 3J).
6. Re-insert the axle into
the hub from the side opposite
the remaining bearing. With the
axle end resting on the inside of
the bearing, tap the bearing out
of the shell with the hammer.
Clean and inspect all com-
ponents. If any cracks or other
damage are visible, replace the
part.
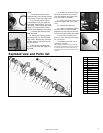
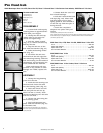
ASSEMBLY
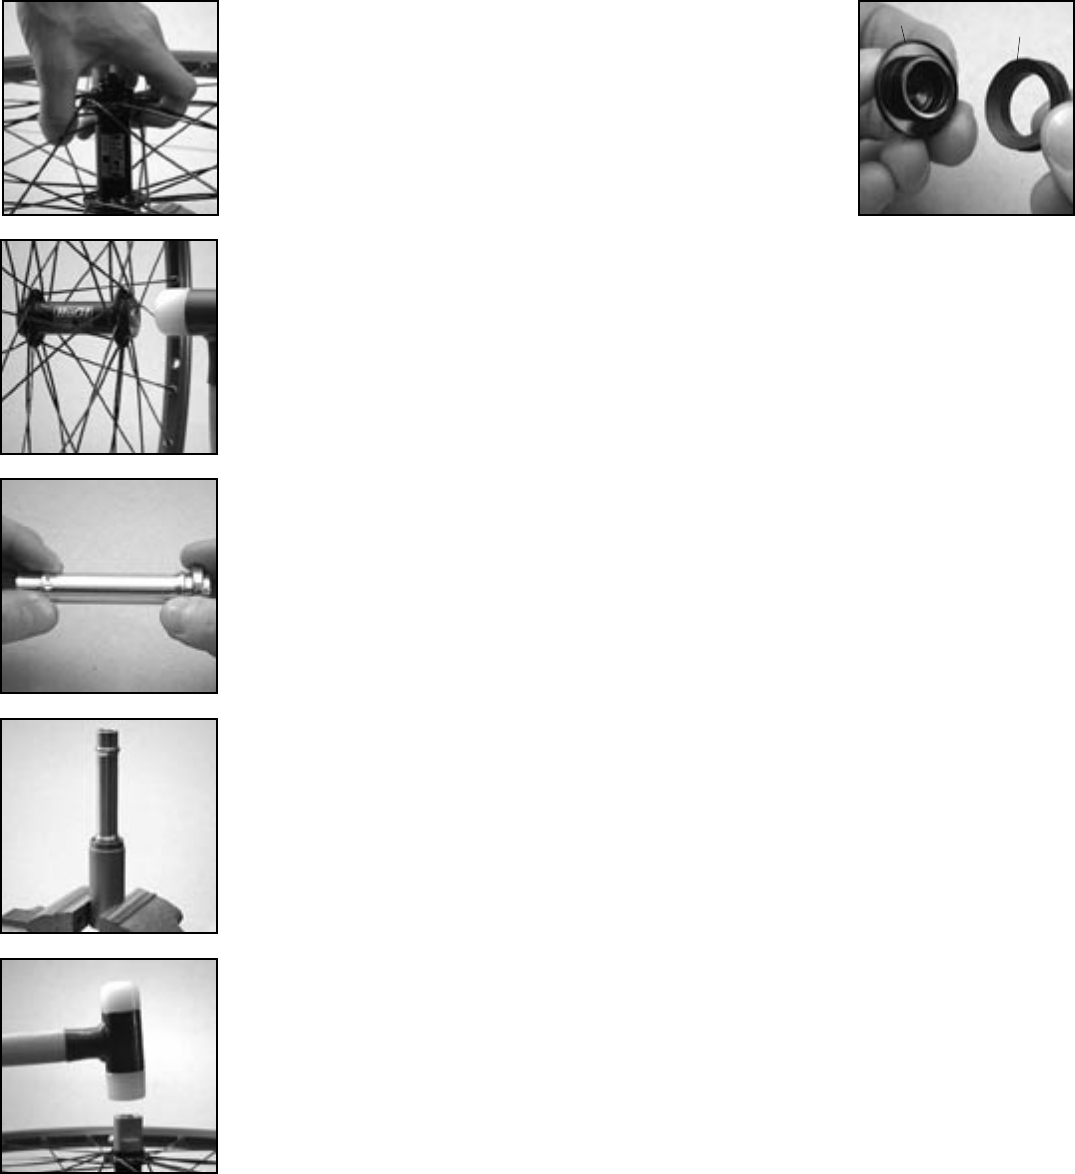
1. Clamp the long bearing
press into the vise.
2. Push the new bearing over
the front axle. Insert the axle
into the bearing press (Fig. 4J).
2. Place the wheel over the
axle and pull the axle out by
about 10 mm (1/2 inch). Push
the second bearing over the axle
and into the hub.
3. Center the axle using the
short bearing press.
4. Tap both bearings into
place with the hammer (Fig. 5J)
at the same time.
Turn the axle to check the bearings. You should not be
able to feel any irregular friction. Make sure that there is
no play in the axle.
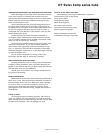
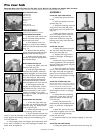
5. Grease both the outer sur-
face of both bearings.
6. Pull the V-seal off the both
end caps (Fig. 13I). Clean each
seal thoroughly with a cloth,
lightly grease it, and reinstall it
on the end cap with the open ‘V’
facing the hub.
7. Push the completed
adapters into place with your
fingers.
After completing assembly of the hub, check its func-
tion by spinning the axle with your fingers. It should rotate freely without irregular friction. A small
amount of lateral play is acceptable if the play is eliminated when the wheel is installed with the
quick release properly closed.
Fig. 1J
Fig. 2J
Fig. 3J
Fig. 4J
Fig. 5J
Fig. 6J
End cap
V-seal
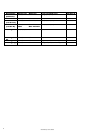
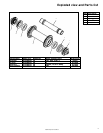
2002 Race Lite, ATB, Race Lite 29, 2003 Race X Lite ATB
O.L.D. . . . . . . . . . . . . . . . . . . . . . . . . . . . . . . . . . . . . . . . . . . . . . . . 100 mm
Spoke hole quantity . . . . . . . . . . . . . . . . . . . . . . . . . . . . . . . . . . . . . . 24°
Spoke hole P.C.D. . . . . . . . . . . . . . . . . . . . . . . . . . . . . . . . . . . . . 40.5 mm
Q.R. rod outer diameter . . . . . . . . . . . . . . . . . . . . . . . . . . . . . . . . . 5 mm
2002/2003 Race X Lite
O.L.D. . . . . . . . . . . . . . . . . . . . . . . . . . . . . . . . . . . . . . . . . . . . . . . . 100 mm
Spoke hole quantity . . . . . . . . . . . . . . . . . . . . . . . . . . . . . . . . . . . . . . 20°
Spoke hole P.C.D. . . . . . . . . . . . . . . . . . . . . . . . . . . . . . . . . . . . . 38.0 mm
Q.R. rod outer diameter . . . . . . . . . . . . . . . . . . . . . . . . . . . . . . . . . 5 mm
2002/2003 Race X Lite Carbon, Race X Lite Aero
O.L.D. . . . . . . . . . . . . . . . . . . . . . . . . . . . . . . . . . . . . . . . . . . . . . . . 100 mm
Spoke hole quantity . . . . . . . . . . . . . . . . . . . . . . . . . . . . . . . . . . . . . . .16°
Spoke hole P.C.D. . . . . . . . . . . . . . . . . . . . . . . . . . . . . . . . . . . . . 38.0 mm
Q.R. rod outer diameter . . . . . . . . . . . . . . . . . . . . . . . . . . . . . . . . . 5 mm