


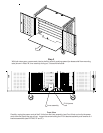
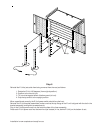

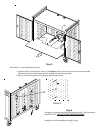

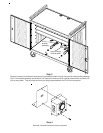

Step 4
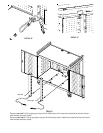
Carefully install replacement E-Unit(s) into position by placing bottom in first and tilting in sideways to the top.
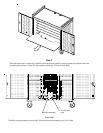
When repositioned correctly, the E-Unit(s) power switch should be visible from rear panel cutout window.
Reinstall the E-Unit bracket assemblies (make sure that the top flange of the E-unit is aligned with the slot in the
bracket assembly) and tighten screws securely.
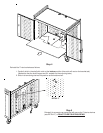
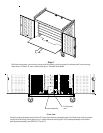
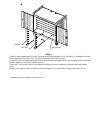
Plug in the E-Unit(s) power cord(s) into the bottom outlet(s) of the timer assembly.
Press E-Unit power cord(s) into the wire clip(s) located at the rear/bottom of the cart.
Fold the power cords into a 'c' pattern, on the bottom surface (see view in Step 5).
cutout
window
clip