


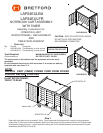
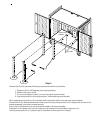
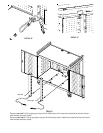

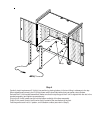

Step 5
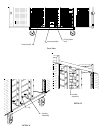
Reinstall the E-Units (set aside from being removed from the front) as follows:
1. Rotate the E-Unit 180 degrees (from original position).
2. Position to the rear of cart.
3. Tilt in and set bottom in back, in front of rear panel cutout window.
4. Grip the top and tilt to the upright position, underneath top panel bracket.
When repositioned correctly, the E-Unit power switch should be visible from rear panel cutout window.
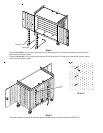
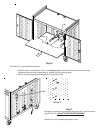
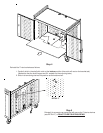
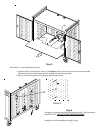
Reinstall the E-Unit bracket assemblies (make sure that the top flange of the E-unit is aligned with the slot in the
bracket assembly) and tighten screws securely.
Plug in the E-Units power cords into the bottom outlets of the timer assembly.
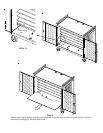
Press each E-Unit power cord into the single wire clip located at the rear/bottom of the cart only.
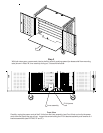
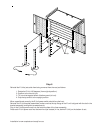
Fold the power cords into a 'c' pattern loop on the bottom surface (see view in Step 6).
clip-rear
cutout
window