


ENTERPRISE & MOBILITY DEPLOYMENT GUIDE
Deploying Brocade Mobility Products with the Brocade FastIron CX Series Page 8 of 16
CONFIGURING WINDOWS SERVICES
Step 1: Set up DNS
1. Go to the Windows Configure Your Server wizard.
2. Enable DNS Server.
3. Create the domain.
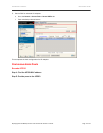
4. Add RFS7000 to the forward lookup table.
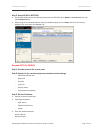
Step 2: Set up DHCP
1. Go to the Windows Configure Your Server wizard.
2. Enable DHCP Server.
3. Create reservations for RFS7000 and APs.
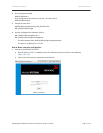
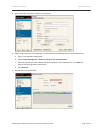
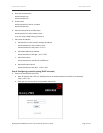
Step 3: Configure IE for RFS7000 and AP Web servers
1. Open an IE browser window.
2. Go to Tools > Internet Options > Advanced.
3. Deselect Use HTTP 1.1.
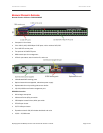
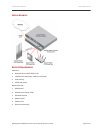
CONFIGURING THE BROCADE FCX 624S-HPOE SWITCH
Step 1: Provide power to the switch
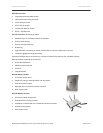
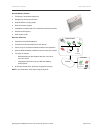
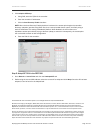
Step 2: Connect to the console port interface
1. Connect a PC or terminal to the serial port of the system using a straight-through cable. The serial port has
a male DB-9 connector. NOTE: You need to run a terminal emulation program on the PC.
2. Launch the terminal emulation program and set the following session parameters:
- Baud: 9600 bps
- Data bits: 8
- Parity: None
- Stop bits: 1
- Flow control: None
NOTE: The EIA or TIA 232 serial communication port serves as a connection point for management by a PC
or SNMP workstation. Brocade devices come with a standard male DB-9 connector
Step 3: Basic switch configuration
1. Enter Privileged Mode:
FCX _SW>
FCX _SW#
2. Enter configuration mode:
FCX _SW#conf t
FCX _SW(config)#