


Setting Up the Machine
10
STEP 1
6 Print quality check
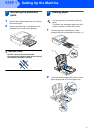
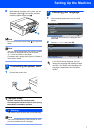
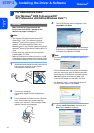
1 Make sure A4, Letter or Legal size paper is
loaded in the paper tray.
Press Colour Start.
The machine starts printing the Print Quality
Check Sheet (only during initial ink cartridge
installation).
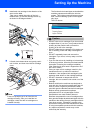
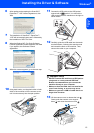
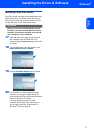
2 Check the quality of the four colour blocks on
the sheet.
(black/yellow/cyan/magenta)
Note
Avoid touching the printed surface of the paper
immediately after printing, the surface may not be
completely dry and may stain your fingers.
3 The LCD shows:
If all lines are clear and visible, press
(Yes) to finish the quality check.
If you can see missing short lines, press
(No) and go to step 4.
4 The LCD asks you if the print quality is OK for
black and colour. Press (Yes) or (No).
After pressing (Yes) or (No) for both
black and colour, the LCD shows:
5 Press (Yes), the machine will then start
cleaning the colours.
6 After cleaning is finished, press Colour Start.
The machine starts printing the Print Quality
Check Sheet again and goes back to step 2.
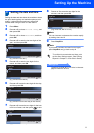
7 Setting the LCD Contrast
You can adjust the LCD contrast for a sharper and
more vivid display. If you are having difficulty reading
the LCD, try changing the contrast setting.
1 Press Menu.
2 Press a or b to choose General Setup.
Press OK.
3 Press a or b to choose LCD Settings.
Press OK.
4 Press a or b to choose LCD Contrast.
5 Press or to choose Light, Med or
Dark. Press OK.
6 Press Stop/Exit.
Note
You can also adjust the angle of the LCD display
by lifting it.
OK Poor
Is Quality OK?
Yes Press
Press
No
Black OK?
Yes Press
Press
No
Color OK?
Yes Press
Press
No
Start Cleaning?
Yes Press
Press
No