CHAPTER 4 OPTIONS
4-5
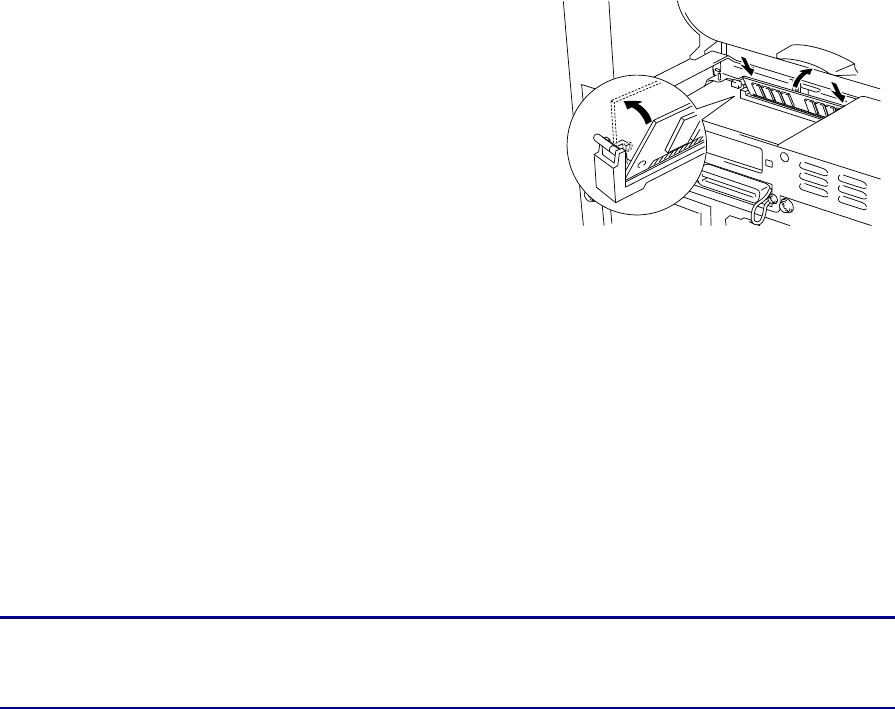
4. Install the SIMM into the slot at an angle, and then
push it gently toward the vertical until it clicks into
place.
5. Re-install the access cover and secure the access cover with the two screws.
6. Close the rear cover.
7. Reconnect the interface cable (printer cable) to your computer. Plug the power cord
into the AC outlet, and then turn on the power switch.
✏ Note
To check that you installed the SIMM correctly, print the configuration sheet by
using the selection in the driver and check it to make sure it shows the additional
memory. See “Print Configuration and Fonts” in Chapter 3.


