


Printing Methods
17
1
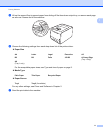
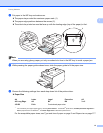
g Close the back cover.
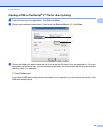
h Choose the following settings from each drop-down list of the printer driver.
Paper Size
1
You can define your original paper size by choosing User Defined... in Windows
®
printer driver, PostScript Custom Page Size in
BR-Script printer driver for Windows
®
, or Custom Page Sizes in Macintosh printer drivers.
For the acceptable paper sizes, see Type and size of paper on page 2 and Paper size on page 177.
Media Type
Paper Source
For any other settings, see Driver and Software in Chapter 2.
Note
• When you use Envelope #10, choose Com-10 for the Paper Size.
• For other envelopes that are not listed in the printer driver, such as Envelope #9 or Envelope C6,
choose User Defined... (for Windows
®
printer driver), PostScript Custom Page Size (for BR-Script
printer driver for Windows
®
) or Custom Page Sizes (for Macintosh printer driver). For more information
on envelope sizes, see Paper size on page 177.
i Send the print data to the machine.
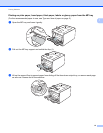
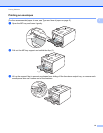
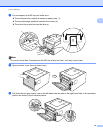
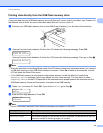
j When you have finished printing, open the back cover and reset the two gray levers their original
position.
Note
• Remove each envelope as soon as it has been printed. Stacking the envelopes may cause them to jam
or curl.
• If envelopes get smudged during printing set the Media Type to Env. Thick or Thicker Paper to increase
the fixing temperature.
• If the envelopes are creased after they are printed, see Improving the print quality on page 159.
• (For Windows
®
users) If DL size double flap envelopes are creased after printing, choose DL Long Edge
in Paper Size, from the Basic tab. Put a new DL size double-flap envelope in the MP tray with the longest
edge of the envelope in first, then print again.
• Envelope joints that are sealed by the manufacturer should be secure.
• All sides of the envelope should be properly folded without wrinkles or creases.
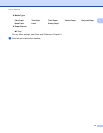
Com-10 DL C5 Monarch DL Long Edge
Customized paper size
1
Envelopes Env. Thin Env. Thick
MP Tray