


36
5
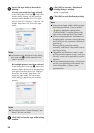
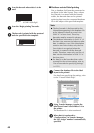
Specify the tape width to be used for
printing.
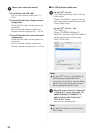
A.If only one printer has been selected
In the dialog box from step
4, select the
printer whose setting is to be specified,
and then either double-click it or right-
click it and click “Settings”. From the “Set
Width” drop-down list, select the tape
width.
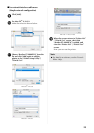
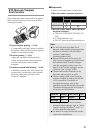
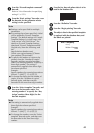
B.If multiple printers have been selected
In the dialog box from step
4, select the
printers whose setting are to be specified,
and right-click them and click “Settings”.
From the “Set Width” drop-down list,
select the tape width. The same tape
width setting is applied to all selected
printers.
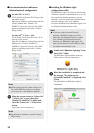
6
Click [OK] to close the tape width setting
window.
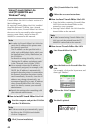
7
Click [OK] to close the “Distributed
Printing Settings” window.
Setup is completed.
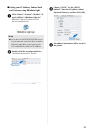
8
Click [OK] to start distributed printing.
Note
● Information to be displayed in the dialog
box from step
4 can be entered in the
“Notes” text box.
Note
● The settings below “Printer Settings” and
“Notes” are not available.
Note
● If the selected tape width is different from
that displayed beside “Current Width”,
appears beside the setting below
“Current Width”. Load the printer with
tape of the width specified “Set Width”.
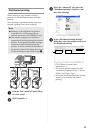
● It may not be possible for information to
be detected for a printer connected using
the PS-9000 or any common USB hub or
print server.
Before printing, enter the settings
manually, and check if the printer can be
used for printing.
● Depending on whether a router is used
and the security features in use, such as a
firewall, it may not be possible to use this
function.
● We recommend performing a connection
test for your operating environment. For
more information, contact a sales
representative.