


6-24
Using the Fax Functions
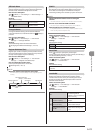
Sender ID
Specify whether to add the sender ID to the fax that you are
sending.
The sender ID is printed at the top of each page that you are
sending, along with the fax number and sender’s name. This
helps the recipient to identify the sender.
How to access the option
[ ] (Menu) → <Fax Settings> → <TX Function
Settings> → <Sender ID>
Settings
(Bold: Default setting)
Off No sender ID is added.
On
Print Location:
On Image, Above Image
Select the location where the
sender ID is printed on the
page.
Mark No. as: TEL/FAX:
FAX, TEL
Select the symbol to be added
in front of the telephone
number.
Check Dial Tone Before Sending
Specify whether to check for a dial tone before dialing.
How to access the option
[ ] (Menu) → <Fax Settings> → <TX Function
Settings> → <Check Dial Tone Before Sending>
Settings
(Bold: Default setting)
Off Do not check for a dial tone.
On Check for a dial tone before dialing.
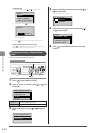
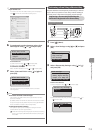
The steps to take for configuring the
receiving settings
Follow the steps in the procedure below to configure the fax
receiving settings.
The procedure describes the steps to change the “ECM RX”
setting.
Keys to be used for this operation
OK
Menu
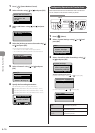
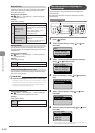
1 Press [ ] (Menu).
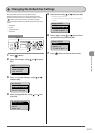
2 Select <Fax Settings> using [ ] or [ ] and press
[OK].
Menu
Timer Settings
Common Settings
Copy Settings
Fax Settings
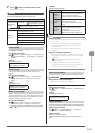
3 Select <RX Function Settings> using [ ] or [ ]
and press [OK].
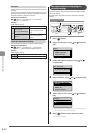
Fax Settings
Basic Settings
TX Function Settings
RX Function Settings
RX Print Settings
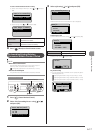
4 Select <ECM RX> using [ ] or [ ] and press [OK].
RX Function Settings
ECM RX
Incoming Ring
Remote RX
Auto RX Switch
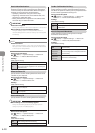
5 Select <Off> or <On> using [ ] or [ ] and press
[OK].
ECM RX
Off
On
* Select <Apply> when <Apply> appears on the screen after you
have specified the setting and press [OK].
6 Press [ ] (Menu) to close the menu screen.
The procedure is complete.