


7-3
Using the Scan Functions
If you cannot scan
You cannot scan when MF Toolbox setting screen is displayed.
Click [ ] to close the screen before starting a scan.
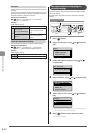
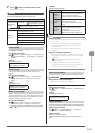
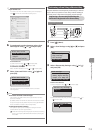
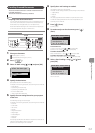
6 To continuously scan the document, select <Scan
Next Original> using [ ] or [ ] and press [OK].
Select Next Action
<Scan Next Original>
<Store and Finish>
<Cancel>
Confirm Destination
To Cancel the scan
(1) Select <Cancel> using [ ] or [ ] and press [OK].
(2) Select <Yes> using [ ] or [ ] and press [OK].
To confirm the destination
Select <Confirm Destination> using [ ] or [ ] and press [OK].
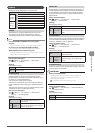
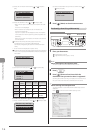
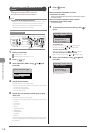
7 Select <Store and Finish> using [ ] or [ ] and
press [OK].
Select Next Action
<Scan Next Original>
<Store and Finish>
<Cancel>
Confirm Destination
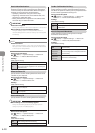
After saving the document, the display returns to the basic
scanning screen.
Note
The location of saved scanned images
After scanning, the folder where the images have been saved to
opens automatically.
By default, folders named with the date when the data was created
are put in the [My Pictures] folder in My Documents]. (On Windows
Vista/7, the folder is created in the [Pictures] folder.)
To change the scanner settings
From your computer you can change the settings for the save
location, file format, and image resolution.
e-Manual→Scanning→Scanning Paper Documents and Saving
Them to a Computer (USB & Network Connection)→Using the
MF Toolbox
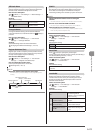
Performing a Scan Using a Shortcut Key
Register destinations and frequently used settings in shortcut
keys in advance, to perform a scan easily without needing to
manually enter a destination and specify required settings.
Registering a Shortcut Key/Confirming the
Destination Registered in the Shortcut Key
Keys to be used for this operation
OK
Menu
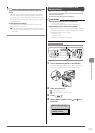
1 Press [ ] (Menu).
2 Select <Scan Settings> using [ ] or [ ] and press
[OK].
Menu
Common Settings
Copy Settings
Fax Settings
Scan Settings
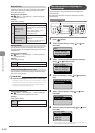
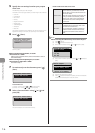
3 Select <Shortcut Key Settings> using [ ] or [ ]
and press [OK].
Scan Settings
TX Function Settings
Memory Media Settings
Output File Image Set
Shortcut Key Settings
To store a new shortcut:
(1) Select <Register> using [ ] or [ ] and press [OK].
Shortcut Key Settings
Register
Confirm Destination
(2) Select the shortcut key that you want to register using [ ] or
[ ] and press [OK].
Select Shortcut Key
Scan PC1
Scan PC2