


7-2
Using the Scan Functions
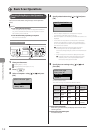
Scanning Using Keys on the Operation
Panel
You can scan a document using the keys on the operation
panel.
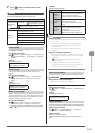
NOTE
To scan using the shortcut keys
When using the shortcut keys which are registered destinations
etc., you can send the documents by scanning with one-touch.
See “Scanning” in the e-Manual.
To scan documents by operating a computer
See “Scan” in the e-Manual.
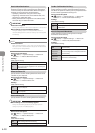
Keys to be used for this operation
OK
SCAN
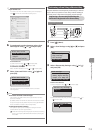
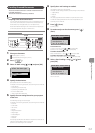
1 Place your document.
“Loading Paper” (→P. 2-9)
“Supported Document Types” (→P. 2-2)
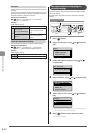
2 Press [ ].
3 Select <Computer> using [ ] or [ ] and press
[OK].
Select the scan type.
Computer
Remote Scanner
Memory Media
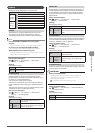
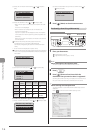
4 Specify a destination using [ ] or [ ] and press
[OK].
Specify destination.
EXAMPLE1
EXAMPLE2
• When multiple computers are connected the computer
connected by a USB cable is listed at the top.
• When a computer is connected by a USB cable this screen is not
displayed.
• If more than ten computers are connected via a network the
eleventh and subsequent computers are not displayed (you
cannot scan). Reduce the number of computers connected to
this machine via a network.
e-Manual→Scanning→Scanning Paper Documents
and Saving Them to a Computer (USB & Network
Connection)→Registering the Scanner in MF Network Scan
Utility
* You can change the names for the displayed computers.
e-Manual→Scanning→Scanning Paper Documents
and Saving Them to a Computer (USB & Network
Connection)→Using the MF Toolbox
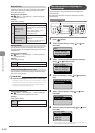
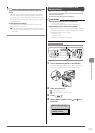
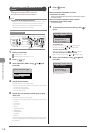
5 Specify the scan settings using [ ] or [ ] and
press [OK].
Select Scan Type
Scan: Press OK
Color Scan
B&W Scan
Custom 1
Scanning operation starts.
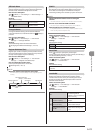
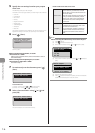
The scanner settings are specified by default as follows.
Scan
Mode
Resolution
File
Type
PDF
Settings
Color Scan Color 300 dpi PDF
Searchable/
Compact
B&W Scan
Black and
White
300 dpi TIFF -
Custom 1 Color 300 dpi
JPEG/
Exif
-
Custom 2 Color 300 dpi PDF
Searchable/
Standard
Scanning from the feeder
After saving the document, the display returns to the basic
scanning screen.
Scanning from the platen glass
Proceed to Step 6
Basic Scan Operations