


Try Scanning
4
Try Scanning
This section explains the basic scanning procedures using the image editing program, ArcSoft PhotoStudio,
and the scanner driver, ScanGear.
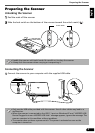
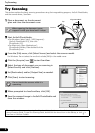
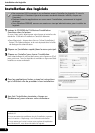
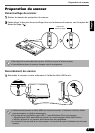
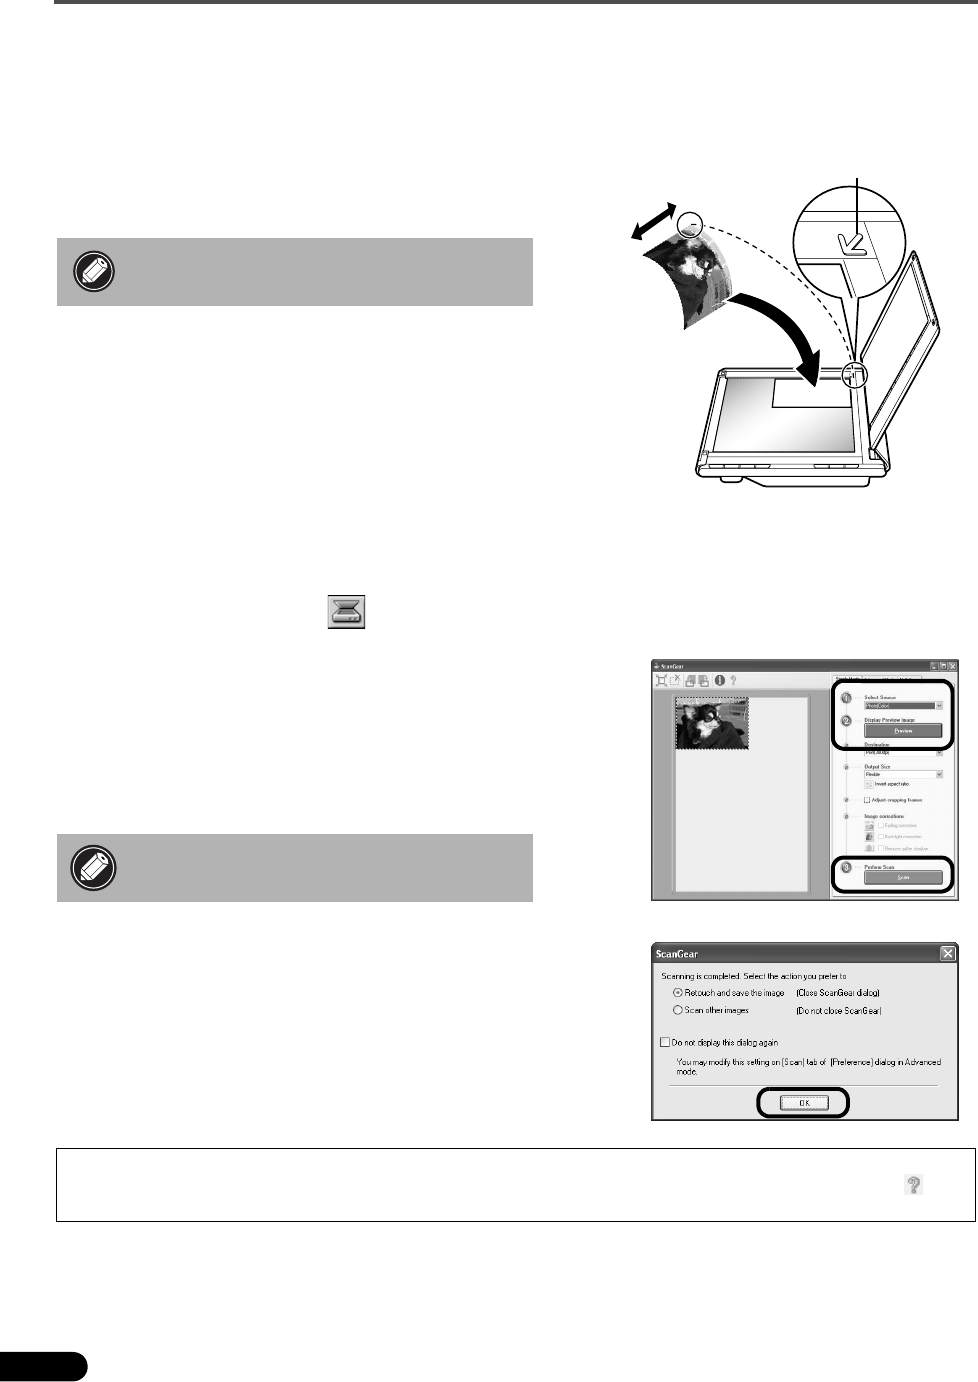
1 Place a document on the document
glass and close the document cover.
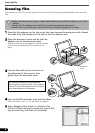
2 Start ArcSoft PhotoStudio.
• For Windows: Select [start] - [(All) Programs] -
[ArcSoft PhotoStudio 5.5], then click
[PhotoStudio 5.5].
• For Macintosh: Open [Applications] -
[PhotoStudio] folders, then double-click the
[PhotoStudio] icon.
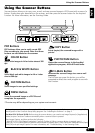
3 From the [File] menu, click [Select Source] and select the scanner model.
For Windows: Do not select the one that includes [WIA] in the model name.
4 Click the [Acquire] icon to start ScanGear.
5 Select the type of document you are scanning in
[Select Source] and click [Preview].
6 Set [Destination] and/or [Output Size] as needed.
7 Click [Scan] to start scanning.
8 When prompted to close ScanGear, click [OK].
9 Save the scanned image in ArcSoft PhotoStudio and
close the window.
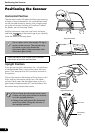
When opening the document cover,
support it with your hand until it stops.
Do not touch the scanner while it is
operating.
For more information on scanning using ScanGear, bundled applications, and troubleshooting, see the on-screen
manual Scanning Guide. To open the Scanning Guide, double-click the manual icon on the desktop, or click in
ScanGear or CanoScan Toolbox.
Alignment Mark
Top
Bottom