


– 12 –
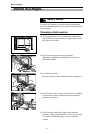
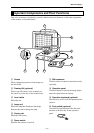
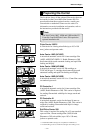
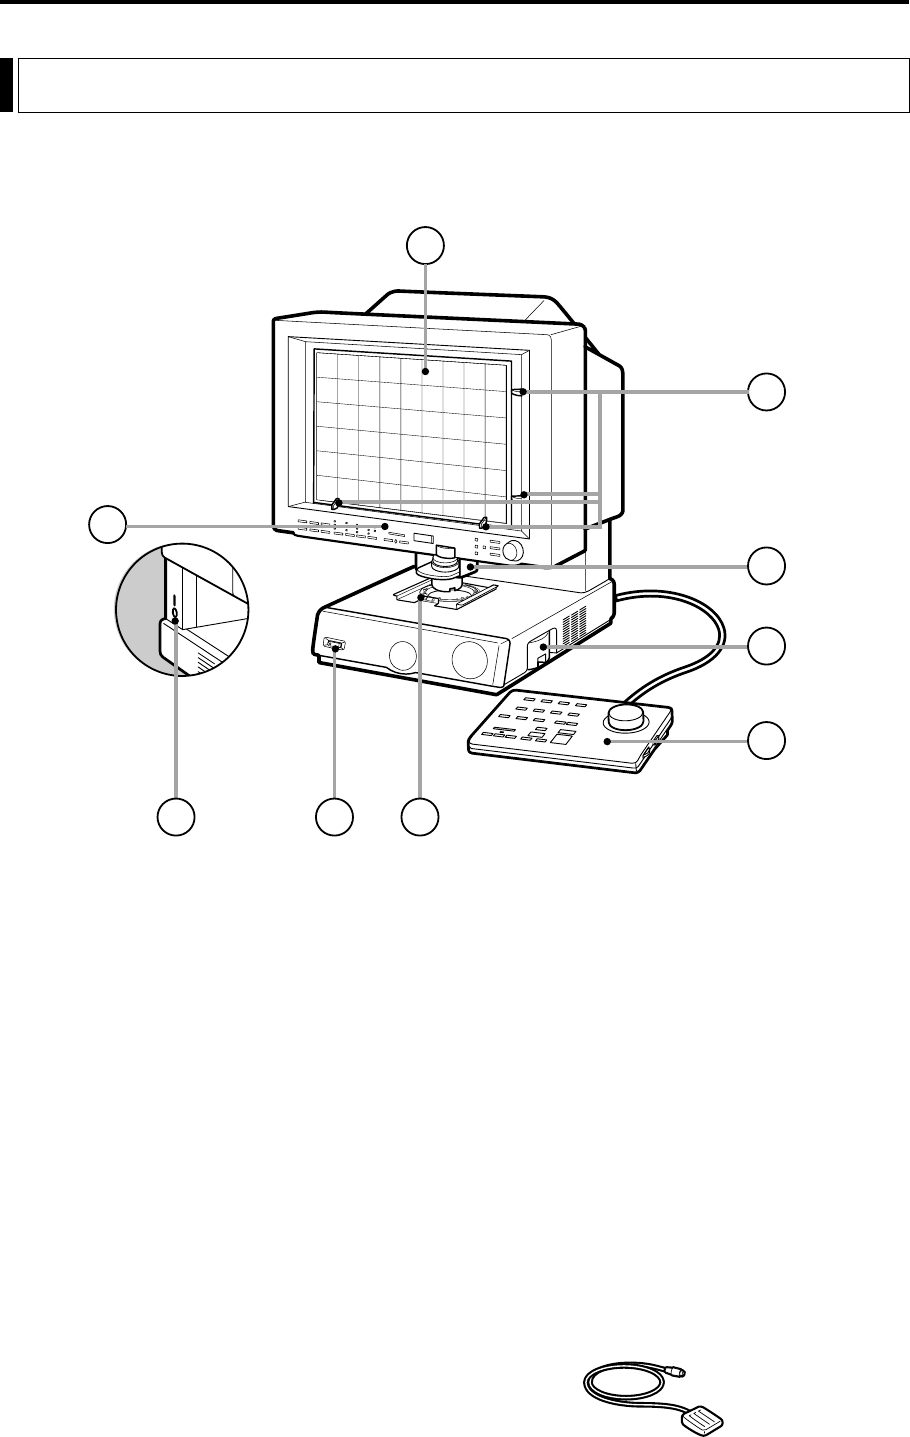
1 Screen
Shows enlarged projections of the images on
the microfilm.
2 Framing Kit (optional)
When a specified area is to be scanned, use
this cursor to set the size of the scanned area.
3 Lens holder
Holds the lens.
4 Lamp unit
Holds the lamp that illuminates the image.
Remove this unit to change the lamp.
5 Carrier pad
Holds the film carrier.
6 Power switch
Switches the scanner on and off.
Important Components and Their Functions
Take a few moments to familiarize yourself with the names and functions of the main components
of the scanner, as described below.
1
2
3
4
9
8
7
6
5
7 DIN connector
Use this socket to connect a motorized carrier
(optional).
8 Operation panel
Use these buttons to specify the image adjust-
ment and operation mode settings.
9 Operation keyboard (optional)
Provides easy access to all the operation panel
controls.
!º Foot switch (optional)
An underfoot switch that provides the same
function as the Start key on the operation
panel.
Before You Begin...