Clearing Printer Feed Jams
5-10
Troubleshooting
5
NOTE
• If the paper does not come out easily, or you cannot grasp the edge of the paper easily,
do not force it out. Proceed to step 2.
● If you cannot see the edge of the paper:
❏ Proceed to step 2.
2
Lift the document feeder tray and document output tray, open the
printer cover, and remove the toner cartridge.
For details, see steps 1 and 2 of “Imaging Area”, on p. 5-8.
IMPORTANT
• Store the toner cartridge in its original protective bag to avoid exposure to light.
3
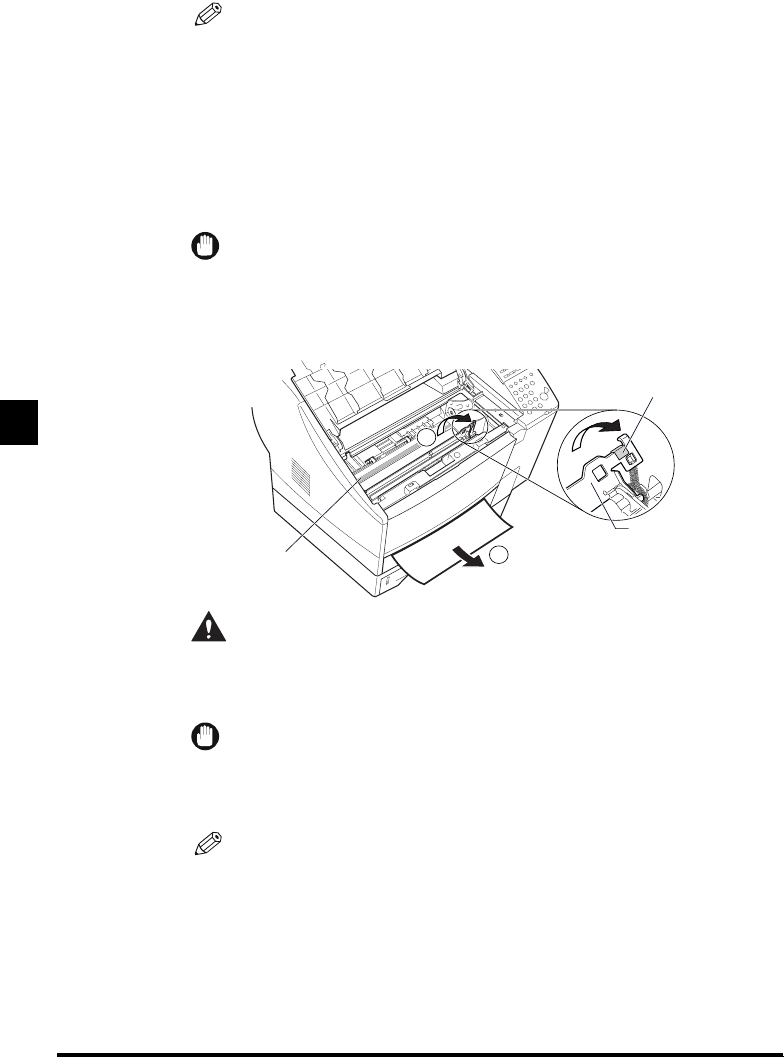
While holding the green label, flip the transfer guide up a, and
slowly pull the paper out from below b.
CAUTION
• The toner fixing unit and its surroundings inside the machine may become hot
during use. When removing jammed paper or when inspecting the inside of the
machine, do not touch the toner fixing unit and its surroundings, as doing so may
result in burns or electrical shock.
IMPORTANT
• When removing the jammed paper, be careful not to touch the transfer charging roller. If
the roller becomes dirty, the print quality deteriorates.
• After removing the jammed paper, make sure you insert the paper cassette all the way
into the main unit until it locks into place.
NOTE
• After removing the paper, gently place the transfer guide back to its original position.
1
2
Transfer
Charging Roller
Green Label
Transfer Guide
