13
Set the Date and Time Set the Telephone Line Type
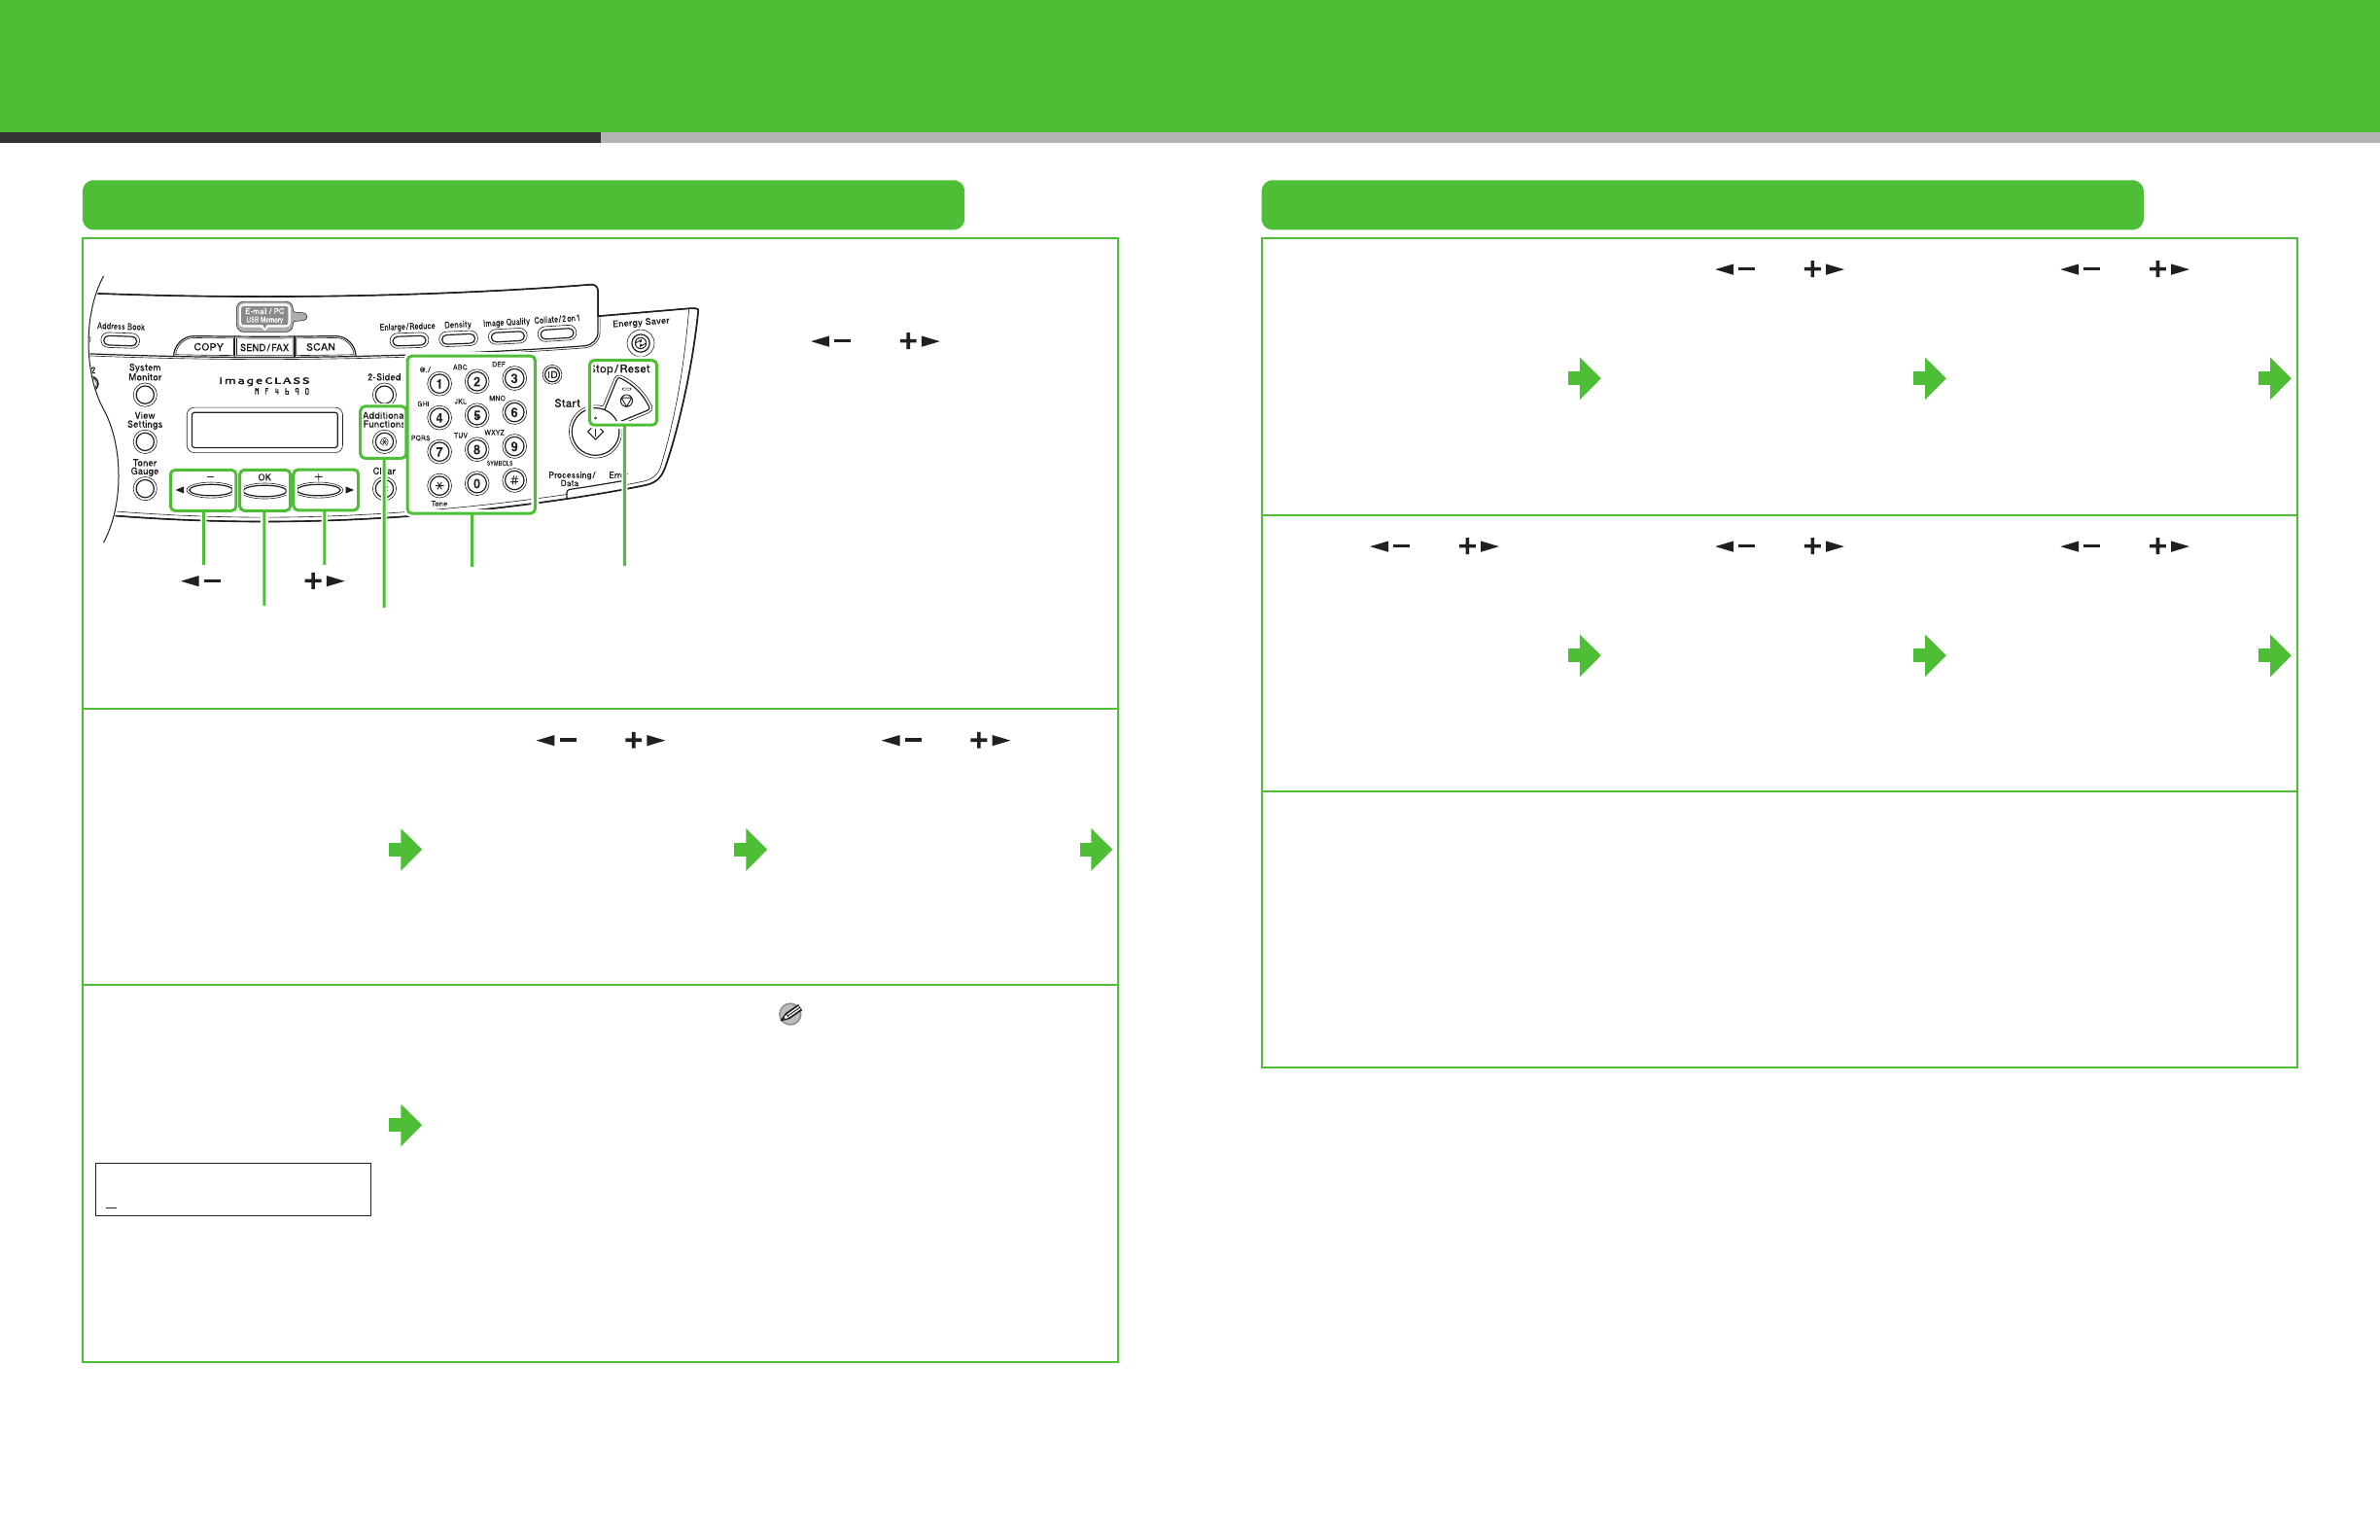
● Entering Information
– Numeric keys: Enters numbers.
– [ ] or [ ]: Moves the
cursor position.
– [OK]: Confirms the entry.
1 Press [Additional
Functions].
2 Press [ ] or [ ] to
select <5. TX/RX
SETTINGS>, then press
[OK].
3 Press [] or [] to
select <2. FAX
SETTINGS>, then press
[OK].
4 Press [] or [] to
select <2. USER
SETTINGS>, then press
[OK].
5 Press [ ] or [ ] to
select <2. TEL LINE
TYPE>, then press [OK].
6 Press [] or [] to
select the telephone line
type, then press [OK].
<TOUCH TONE>: Tone dialing
(default)
<ROTARY PULSE>: Pulse dialing
1 Press [Additional
Functions].
2 Press [] or [] to
select <8. TIMER
SETTINGS>, then press
[OK].
3 Press [ ] or [ ] to
select <1. DATE&TIME
SETTING>, then press
[OK].
7 Press [Stop/Reset] to
return to the standby
mode.
4 Use the numeric keys to
enter the date (month/day/
year) and time (in 24-hour/
military time format), then
press [OK].
5 Press [Stop/Reset] to
return to the standby
mode.
NOTE
– You can select the date format
among three types listed below at
<3. DATE TYPE SELECT>.
– <MM/DD/YYYY>
– <DD/MM YYYY>
– <YYYY MM/DD>
– By default, <6. DAYLIGHT
SV.TIME> in the <8. TIMER
SETTINGS> menu is set to <ON>.
If you want to set <6. DAYLIGHT
SV.TIME> in the <8. TIMER
SETTINGS> menu to <OFF>, see
Chapter 1, “Before Using the
Machine,” in the Basic Operation
Guide.
[OK]
Numeric
Keys
[]
[]
[Stop/Reset]
[Additional
Functions]
Ex.
DATE&TIME SETTING
12/31/´07 23:19
14


