11
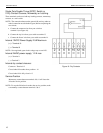
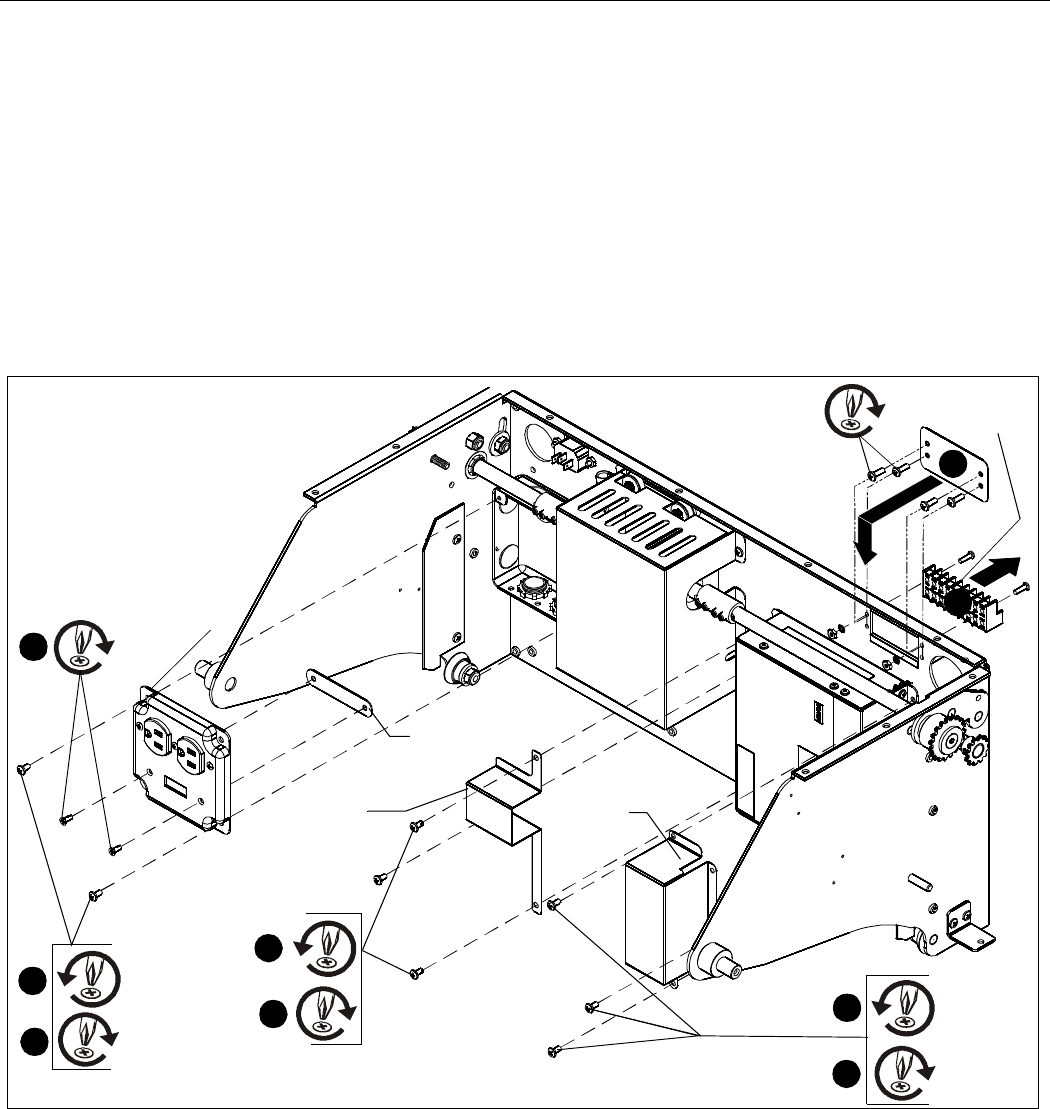
(Optional) Installing Wiring Cover
An optional wiring cover may be installed to further protect
wiring from mechanical damage.
WARNING: Make sure that power to SL-236 is OFF before
proceeding!
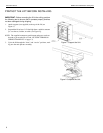
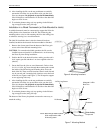
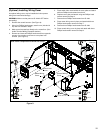
1. Remove the control harness. (See Figure 9)
2. Using four Phillips head screws, attach cover (included in
kit) over hole created in Step 1.
3. Make control connections directly to the control box. (See
Inside Terminal Wiring Examples sections.)
4. Remove and save two Phillips head screws from opposite
corners of cover plate, and remove cover plate from
SL-236. (See Figure 9)
5. Place switch hole cover behind the cover plate and attach
with two Phillips head screws from the kit.
6. Replace cover plate and attach using two Phillips head
screws removed in Step 4.
7. Remove three Phillips head screws from SL-236.
8. Place motor wiring cover in place and attach with three
Phillips head screws removed in Step 7.
9. Remove three Phillips head screws from SL-236.
10. Place control wiring cover in place and attach with three
Phillips head screws removed in Step 9.
Figure 9
6
5
4
x 2
x 2
Switch Hole
Cover
Cover
Plate
7
x 3
8
Motor Wiring
Cover
9
x 3
10
Control Wiring
Cover
NOTE: Some components not shown for clarity.)
x 2
x 3
Control
Harness
1
x 4
2


