


14
DHD800 User Manual
020-000244-01 Rev.1 (08-2010)
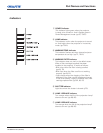
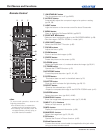
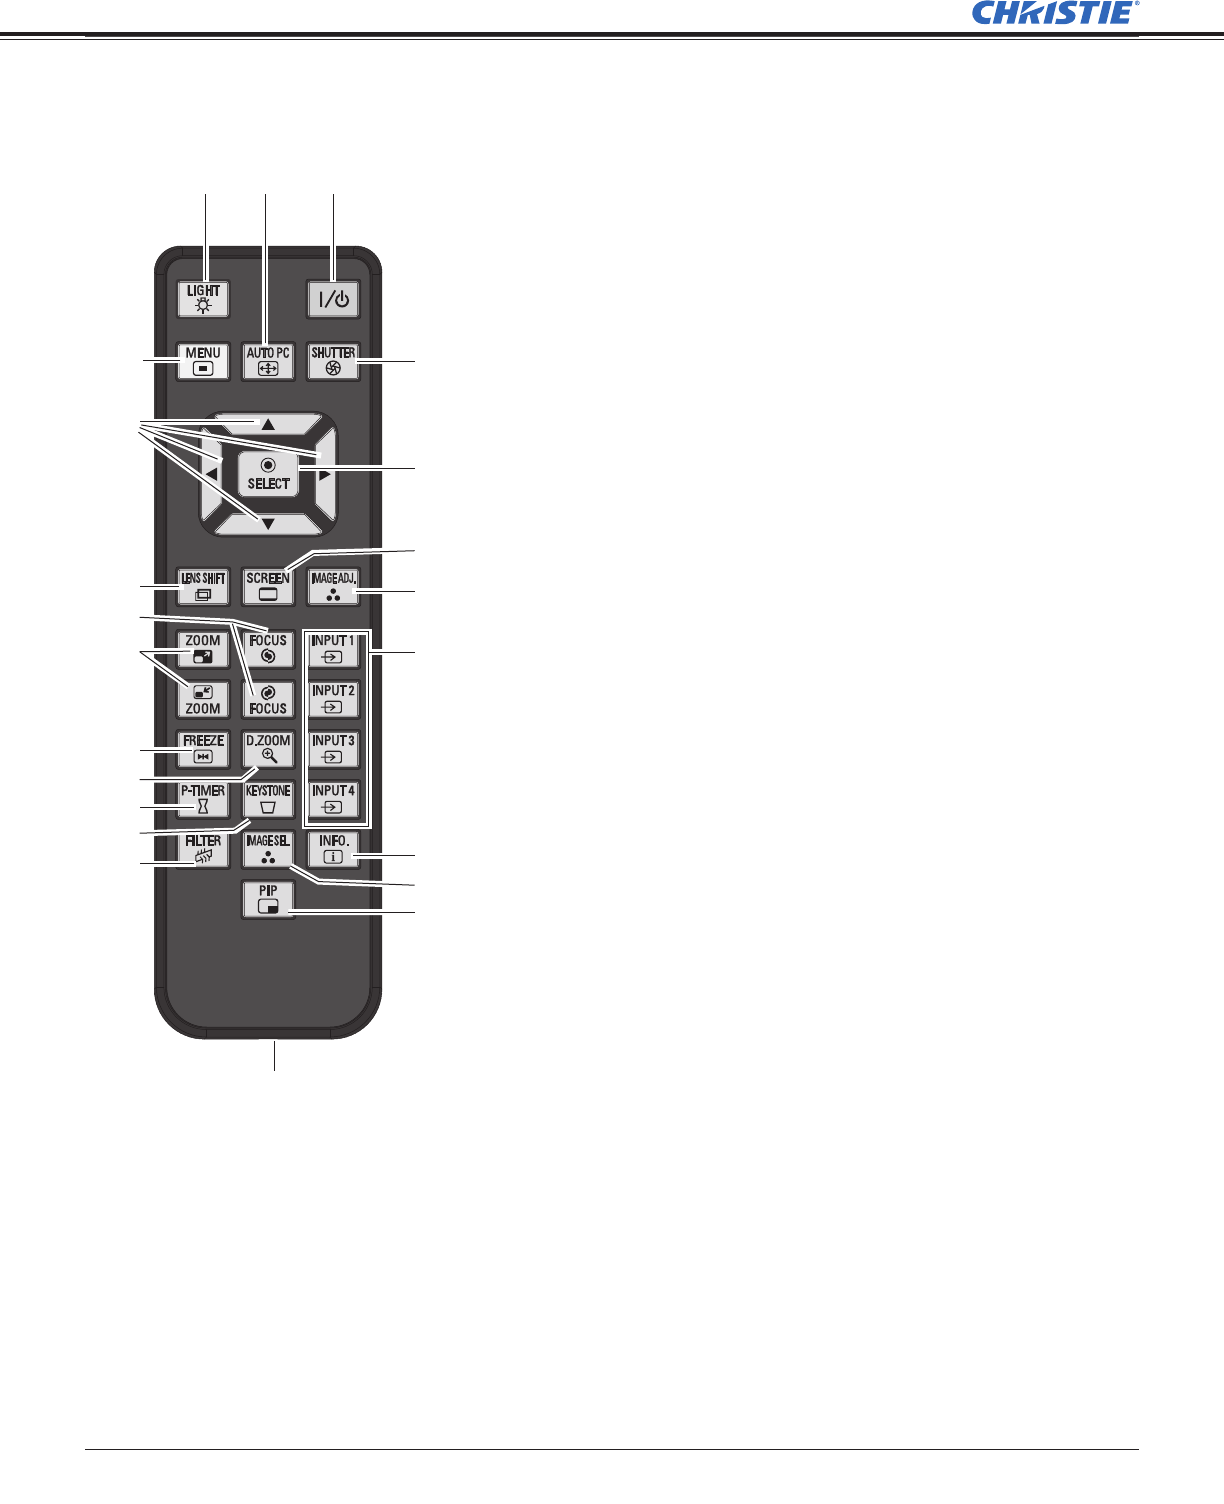
Remote Control
Part Names and Functions
D
G
8
<
E
J
L
B
8
LIGHT button
Light the buttons on the remote control for about 10 seconds.
E
MENU button
Open or close the On-Screen MENU. (pp.26-27)
G POINT 54 buttons
– Select an item or adjust the value in the ON-SCREEN MENU. (p.26)
–Pan the image in DIGITAL ZOOM +/– mode. (p.41)
L
LENS SHIFT button
Select the LENS SHIFT function. (p.30)
H
FOCUS buttons
Adjust the focus. (p.30)
<
ZOOM buttons
Zoom in and out the images. (p.30)
B
FREEZE button
Freeze the picture on the screen. (p.30)
P-TIMER button
Operate the P-TIMER function. (p.31)
KEYSTONE button
Correct keystone distortion. (pp.31, 41, 45)
D
ON/STAND-BY button
Turn the projector on or off. (pp.24-25)
J
AUTO PC button
Automatically adjust the computer image to its optimum setting.
(pp.30, 36)
SHUTTER button
Close the built-in shutter for light blocking. (pp.28, 31)
SELECT
button
–Execute the selected item. (p.26)
– Expand or compress the image in the DIGITAL ZOOM mode. (p.41)
Wired Remote Jack
Connect the
remote control cable (not supplied) to this jack when
using as a wired remote control.
IMAGE SEL. button
Select the image level. (pp.31, 39, 43)
INPUT 1, 2, 3, 4
button
s
Select an input source. (pp.32-34)
IMAGE ADJ. button
Enter the image level adjustment mode. (pp.31, 46-48)
INFO. button
Display the input source information. (p.30)
SCREEN button
Select the screen size. (pp.40-41, 44-45)
D.ZOOM
button
Select the Digital zoom +/- mode and resize the image. (pp.30, 41)
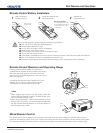
Note:
To ensure safe operation, observe the
following precautions:
• Do not bend, drop, or expose the
remote control to moisture or heat.
• For cleaning, use a soft dry cloth. Do
not apply benzene, thinner, spray, or
any other chemical materials.
FILTER button
This button does not work in the default state. (p.31)
PIP button
Operate the Picture In Picture function. (p.30)
H