


6
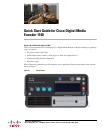
Quick Start Guide for Cisco Digital Media Encoder 1100
OL-17934-01
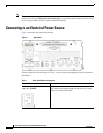
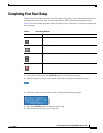
Completing First Start Setup
6. To set the date, use the <UP> and <DOWN> arrow keys to increment the numerical value of the
month.
7. Once you set the numerical value for the month, press the <STREAM> button to move to the day
field.
8. Again, use the <UP> and <DOWN> arrow keys to increment the numerical value of the day.
9. Press <STREAM> to enter the value and move to the year field.
10. Use the same process for setting the month and day so that you may set the year.
11. If you want to change a previous setting, you can continue pressing the <STREAM> button until
the cursor cycles around to the month.
12. Once you are satisfied with your settings, you then press the <ENTER> button to accept the settings
and move to the next screen to set the system clock.
13. The encoder uses Military Time, which is a 24-hour clock format, for its system clock entries.
14. Use the <UP>, <DOWN>, <STREAM>, and <ENTER> buttons to set the hour and minute of the
system clock.
15. The last setting is the selection of the video input format that you will enter into the encoder.
16. You will see the following prompt message:
17. Press the <ENTER> button to continue.
18. Select your video source format from either NTSC or PAL.
19. Press the <ENTER> button to set the format, and the final screen will appear confirming that you
have successfully set up your encoder.
20. Press the <ENTER> button to exit the setup menu and begin using your encoder.