


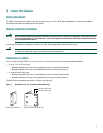

5
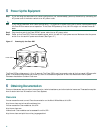
3 Install the Chassis
Safety Information
For safety information you need to know before working on your Cisco RPS, see the Regulatory Compliance and Safety
Information document that accompanied this device.
Chassis Installation Methods
Warning
Only trained and qualified personnel should be allowed to install or replace this equipment. To see translations of
the warnings that appear in this publication, refer to the Regulatory Compliance and Safety Information document
that accompanied this device.
You can set the chassis on a desktop or install it in a rack. See the applicable instructions following.
Caution Your chassis installation must allow unrestricted airflow for chassis cooling. For installation on a desktop, be sure
to install the rubber feet; they provide clearance for cooling airflow.
Installation in a Rack
You can install the Cisco RPS in a 19-inch, 23-inch, or 24-inch rack with the following chassis orientations:
• In a 19-, 23-, or 24-inch rack:
–
Brackets attached at the front of the chassis with the front panel facing forward
–
Brackets attached at the rear of the chassis with the rear panel facing forward
• In a center-mount telco rack:
–
Brackets attached at the front of the chassis with the front panel facing forward
–
Brackets attached at the rear of the chassis with the rear panel facing forward
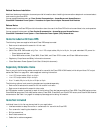
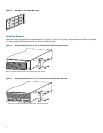
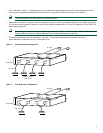
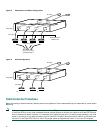
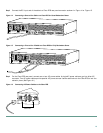
The rack-mounting brackets are shown in Figure 1 and Figure 2.
Figure 1 Brackets for 19-, 23-, and 24-Inch Rack-Mounting
H9695
Bracket for 23- and 24-inch rack
Use with 23-inch rac
k
B
racket for 19-inch rack
Use with 24-inch rac
k