


17-8
Cisco ASA Series Firewall CLI Configuration Guide
Chapter 17 Configuring the TLS Proxy for Encrypted Voice Inspection
Configuring the TLS Proxy for Encrypted Voice Inspection
• Creating Trustpoints and Generating Certificates, page 17-9
• Creating an Internal CA, page 17-10
• Creating a CTL Provider Instance, page 17-11
• Creating the TLS Proxy Instance, page 17-12
• Enabling the TLS Proxy Instance for Skinny or SIP Inspection, page 17-13
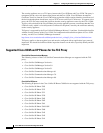
Task flow for Configuring the TLS Proxy for Encrypted Voice Inspection
To configure the security appliance for TLS proxy, perform the following steps:
Step 1 (Optional) Set the maximum number of TLS proxy sessions to be supported by the security appliance
using the following command, for example:
ciscoasa(config)# tls-proxy maximum-sessions 1200
Note The tls-proxy maximum-sessions command controls the memory size reserved for
cryptographic applications such as TLS proxy. Crypto memory is reserved at the time of system
boot. You may need to reboot the security appliance for the configuration to take effect if the
configured maximum sessions number is greater than the currently reserved.
Step 2 Create trustpoints and generate certificates for the TLS Proxy for Encrypted Voice Inspection. See
Creating Trustpoints and Generating Certificates, page 17-9.
Step 3 Create the internal CA to sign the LDC for Cisco IP Phones. See Creating an Internal CA, page 17-10.
Step 4 Create the CTL provider instance. See Creating a CTL Provider Instance, page 17-11.
Step 5 Create the TLS proxy instance. See Creating the TLS Proxy Instance, page 17-12.
Step 6 Enable the TLS proxy y with SIP and Skinny inspection. See Enabling the TLS Proxy Instance for
Skinny or SIP Inspection, page 17-13.
Step 7 Export the local CA certificate (ldc_server) and install it as a trusted certificate on the Cisco UCM server.
a. Use the following command to export the certificate if a trust-point with proxy-ldc-issuer is used
as the signer of the dynamic certificates, for example:
ciscoasa(config)# crypto ca export ldc_server identity-certificate
b. For the embedded local CA server LOCAL-CA-SERVER, use the following command to export its
certificate, for example:
ciscoasa(config)# show crypto ca server certificate
Save the output to a file and import the certificate on the Cisco UCM. For more information, see the
Cisco Unified CallManager document:
http://www.cisco.com/univercd/cc/td/doc/product/voice/c_callmg/5_0/iptp_adm/504/iptpch6.htm#wp1
040848
After this step, you may use the Display Certificates function on the Cisco Unified CallManager GUI to
verify the installed certificate:
http://www.cisco.com/univercd/cc/td/doc/product/voice/c_callmg/5_0/iptp_adm/504/iptpch6.htm#wp1
040354