


How to Upgrade to the Cisco MeetingPlace Audio Server Release 5.2 DVD-ROM
13
Cisco MeetingPlace Audio Server Release 5.2 DVD-ROM Upgrade Procedure
78-16489-01
Step 9 Inform Cisco TAC that you are ready for the license key replacement.
Step 10 Perform full functionality testing.
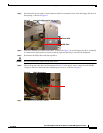
Step 11 Return the old CPU card to manufacturing.
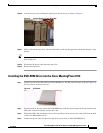
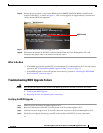
Installing the DVD-ROM Drive Software
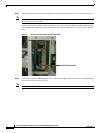
Step 1 By using the null modem cable, connect the laptop to the COM1 service port on the front of the
Cisco MeetingPlace 8112.
Step 2 Log in to the server as a technician through a telnet session or HyperTerminal.
Tip We recommend that you log your session.
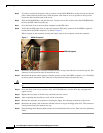
Step 3 Insert the Update Diskette for M3 DVD-ROM into the floppy disk drive.
Step 4 To install the DVD-ROM software on the system hard drive, enter update at the tech$ prompt and choose
d for diskette.
Step 5 When the system reminds you to wait for the blinking light to stop, press Enter.
Step 6 After the light stops blinking, remove the diskette from the floppy disk drive.
The server is now upgraded to use the DVD-ROM drive.
Step 7 Insert the CD-ROM that contains the test image into the DVD-ROM drive.
Step 8 At the tech$ prompt, enter update.
Step 9 When prompted, choose 1 for CD and press Enter.
Step 10 When prompted to continue or abort, press Enter.
After the update is completed, a CD mounted OK message and more system options appear.
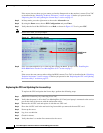
Step 11 To perform the CD Test, choose 1 when you are asked to choose the desired set.
Step 12 When you are prompted to install the CD Test, enter y. Sample output from a CD test is shown in the
“Installing the DVD-ROM Software Example” section on page 13.
Step 13 If the test passes, proceed to “Verifying the Cisco MeetingPlace Audio Server Release 5.2 DVD-ROM
Upgrade” section on page 14.
or
If the test fails, contact Cisco TAC.
Installing the DVD-ROM Software Example
The following is sample output from a CD-ROM test that passes.
server: tech$ update
Update is from
1) CD
2) Diskette
3) Remote File