


How to Upgrade to the Cisco MeetingPlace Audio Server Release 5.2 DVD-ROM
7
Cisco MeetingPlace Audio Server Release 5.2 DVD-ROM Upgrade Procedure
78-16489-01
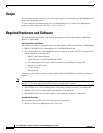
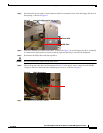
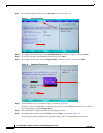
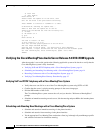
Step 10 Loosen the two screws holding the tape drive in the drive bay, as shown in Figure 5.
Figure 5 Captive Screws on the Drive Bay
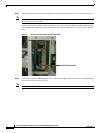
Step 11
Slowly slide out the tape drive. You should be able to slide out the tape drive such that it narrowly clears
the bay.
Tip If you cannot slide out the tape drive, go to the back of the server to see what is preventing the tape drive
from sliding out.
Step 12 Disconnect the power cable from the tape drive.
Step 13 Remove the tape drive.
Installing the DVD-ROM Drive into the Cisco MeetingPlace 8112
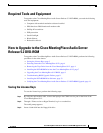
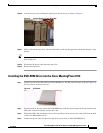
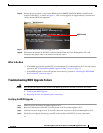
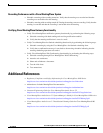
Step 1 Connect one end of the IDE cable to the DVD-ROM drive. The IDE cable is keyed, as shown in Figure 6,
and can only be connected one way.
Figure 6 IDE Cable
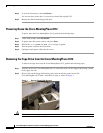
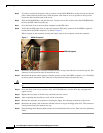
Step 2
From the front of the server, hold the DVD-ROM drive with the ejector button on the top and place the
IDE cable, connector end first, into the drive bay.
Step 3 Slide in the IDE cable into the drive bay as far as possible so that you can access the cable from the back
of the Cisco MeetingPlace 8112.
Step 4 Connect the power cable, the previous tape drive power cable, to the DVD-ROM drive.