


26
Installing the Cisco WAE Inline Network Adapter
OL-12480-03
Cabling
Completing the Installation
To complete your installation, follow these steps:
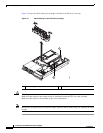
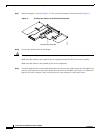
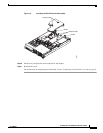
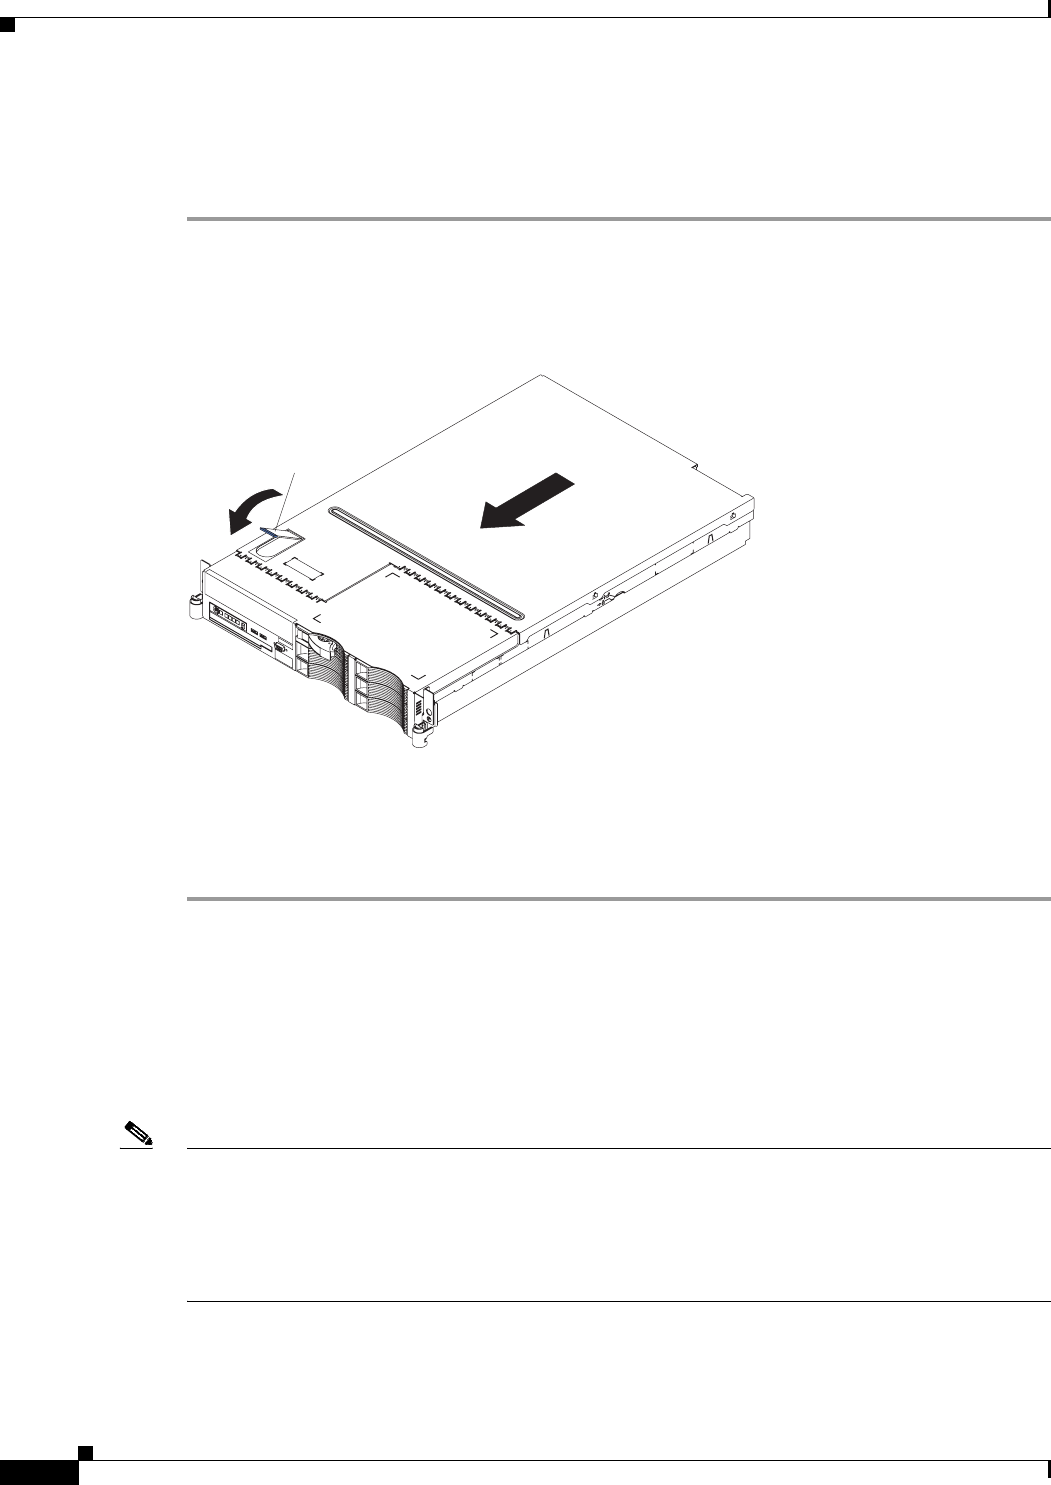
Step 1 Install the top cover by placing the cover-release latch in the open (up) position. Insert the bottom tabs
of the top cover into the matching slots in the WAE chassis. Press down on the cover-release latch to lock
the cover in place, as shown in Figure 19.
Figure 19 Installing the Cover
Step 2
Install the device in a rack.
Step 3 Connect all external cables and power cords to the appliance, and then plug the power cords into a
properly grounded electrical outlet.
Cabling
The inline network adapter ships with two types of cables: crossover and straight-through. When you
connect the WAE inline network adapter, the cable that you use depends on the link speed (Gigabit
Ethernet or Fast Ethernet) and the types of devices (DCE or DTE) being connected.
Note You must retain the same link speed from one end of the connection to the other end. Inline adapter
interfaces are able to autonegotiate link speeds. If you configure any of your connecting interfaces for
Fast Ethernet (whether on a switch or a router), your WAE inline adapter uses Fast Ethernet. If you
configure any of your connecting interfaces for Gigabit Ethernet, your WAE inline adapter uses Gigabit
Ethernet. Speed and duplex settings are port specific so that two inline ports can negotiate different
speeds independently.
Cover-release latch
185093