Disassembly
Removing the PC Card Assembly 2 - 29
2.Disassembly
Removing the PC Card Assembly
1. Turn off the computer, remove the battery (page 2 - 8), hard disk (page 2 - 9), RAM (page 2 - 10), CD Device (page
2 - 12), Bluetooth module (page 2 - 14), Wireless LAN module (page 2 - 15), CPU (page 2 - 16), keyboard (page 2 -
18), keyboard shielding plate (page 2 - 19), the top case and LCD (page 2 - 20), speakers (page 2 - 25) and main-
board (
page 2 - 26).
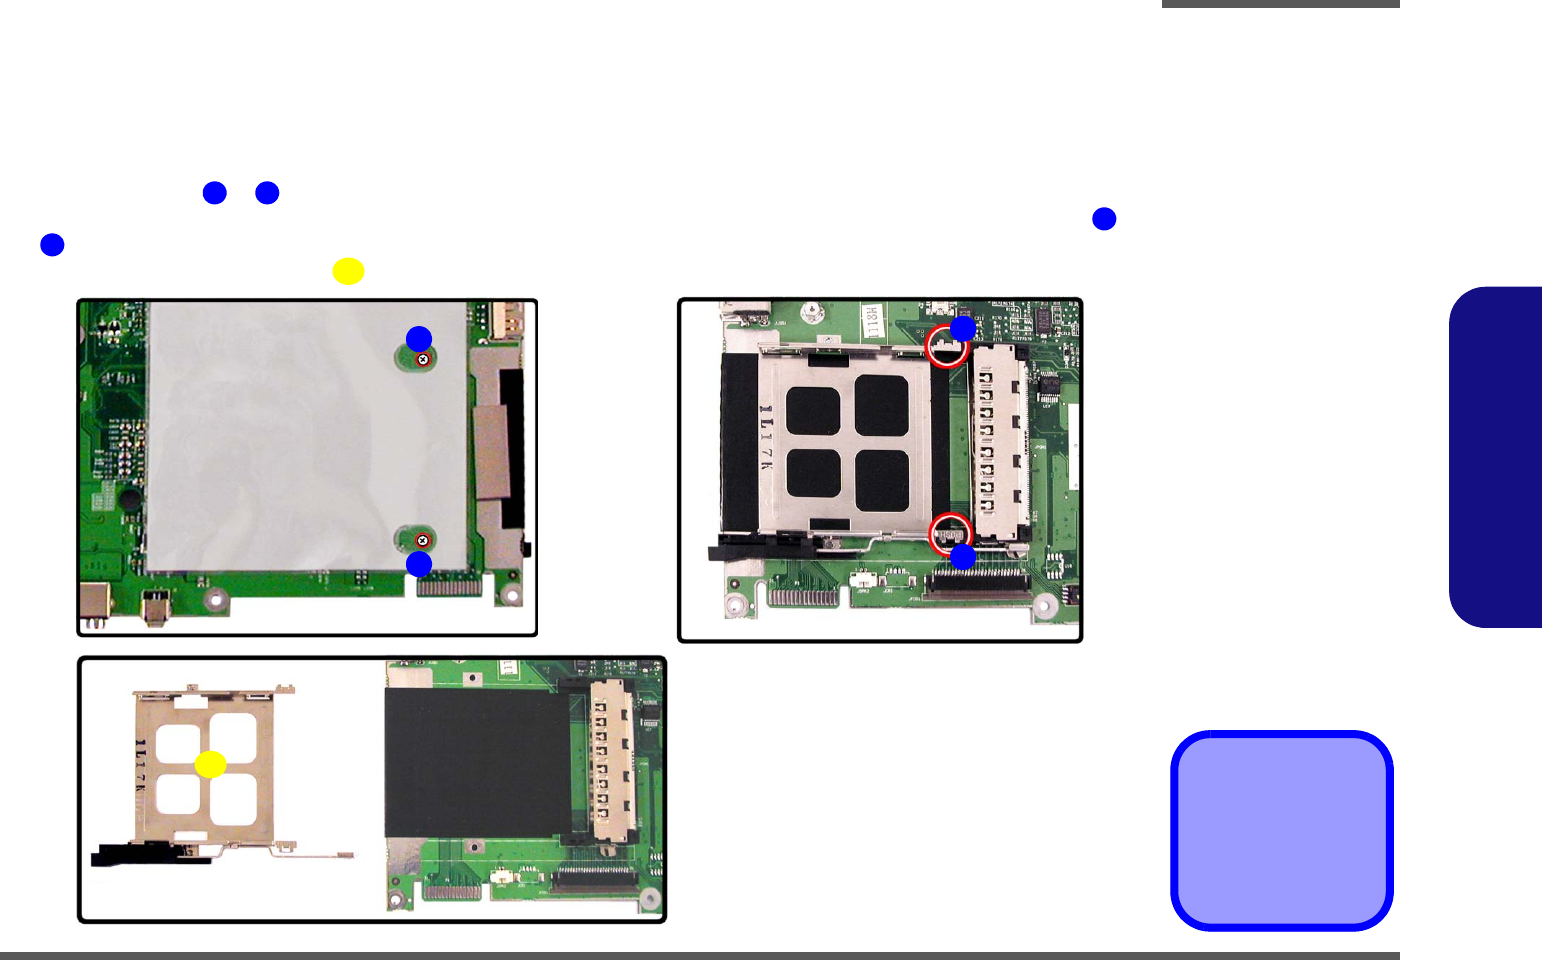
2. Remove screws & (Figure 22a).
3. Carefully ease (use a small screwdriver) the metal pins which hold the PC Card assembly in place, at points &
(Figure 22b) off the black plastic unit.
4. Lift off the PC Card assembly (Figure 22c) off the mainboard.
5. PC Card Assembly
•2 Screws
Figure 22
PC Card Assembly
Removal
a. Remove the screws.
b. Separate the metal pins
from the black plastic
unit.
c. Lift the PC Card assem-
bly off the mainboard.
1 2
3
4
5
1
2
a. b.
3
4
c.
5


