


Replacing the Display Panel
1. Follow the instructions in Before You Begin.
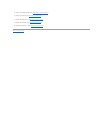
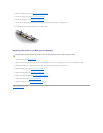
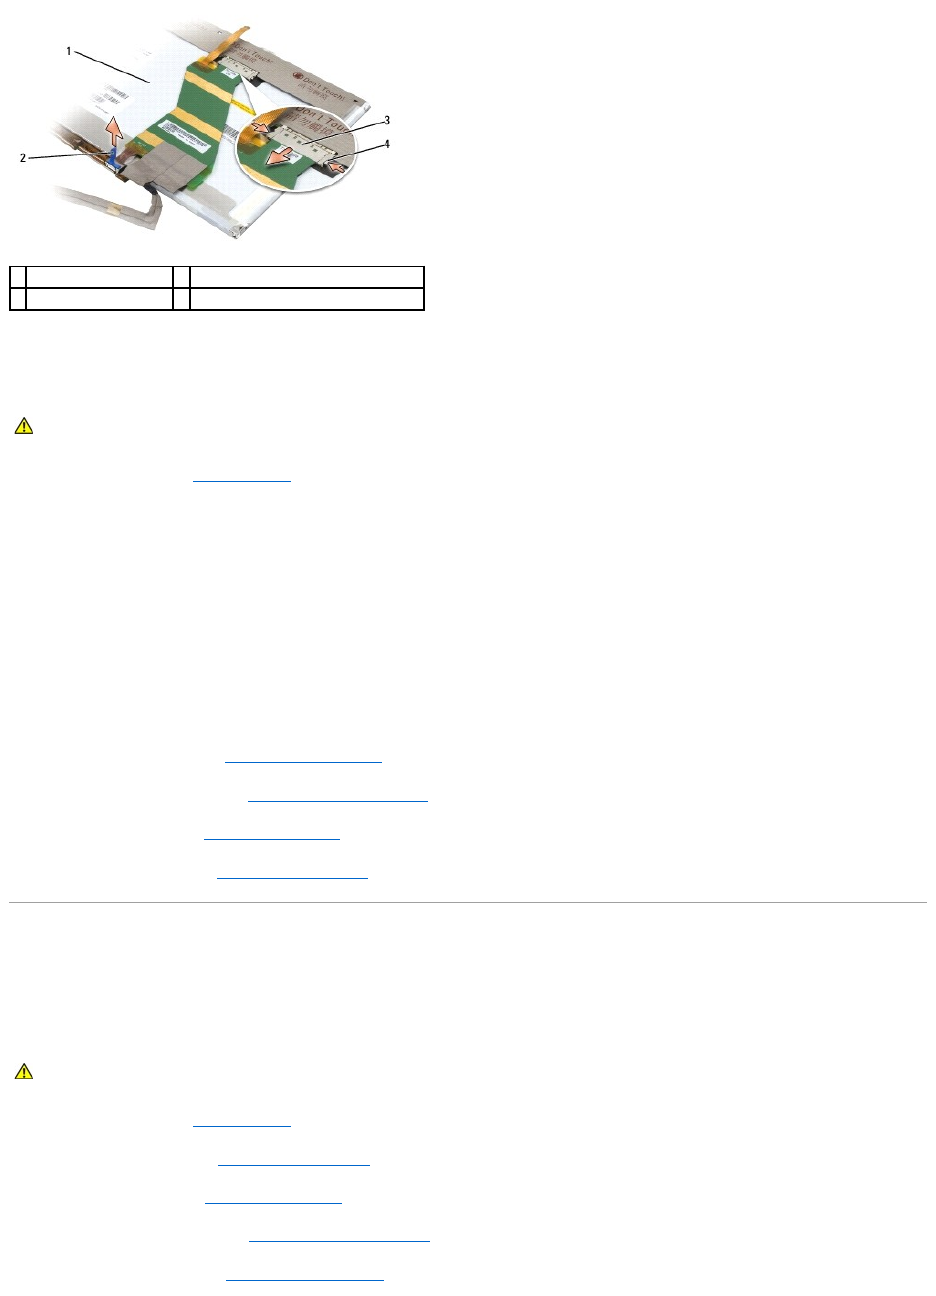
2. Connect the top flex-cable connector to the display connector.
3. Connect the bottom flex-cable connector to the inverter connector.
4. Align the screw holes on the display panel with the corresponding screw holes and guide pins on the top cover.
5. With the top of the display panel raised slightly, slide the camera/microphone cable into the camera/microphone connector, then rotate the
camera/microphone connector latch downward to secure the cable.
6. Gently lower the display panel into place.
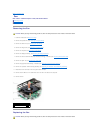
7. Replace the eight M2 x 3-mm screws (four on each side of the display panel) to secure the display panel to the display cover.
8. Replace the display bezel (see Replacing the Display Bezel).
9. Replace the display assembly (see Replacing the Display Assembly).
10. Replace the keyboard (see Replacing the Keyboard).
11. Replace the hinge cover (see Replacing the Hinge Cover).
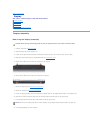
Display Latch
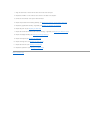
Removing the Display Latch
1. Follow the instructions in Before You Begin.
2. Remove the hinge cover (see Removing the Hinge Cover).
3. Remove the keyboard (see Removing the Keyboard).
4. Remove the display assembly (see Removing the Display Assembly).
5. Remove the display bezel (see Removing the Display Bezel).
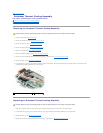
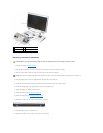
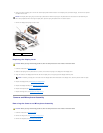
1
back of display planel
2
pull tab on bottom flex-cable connector
3
top flex-cable connector
4
metal clamps (2)
CAUTION: Before you begin the following procedure, follow the safety instructions in the Product Information Guide.
CAUTION: Before you begin the following procedure, follow the safety instructions in the Product Information Guide.