


Back to Contents Page
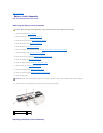
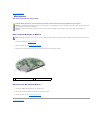
System Board Assembly
Dell™Studio1535/1536/1537ServiceManual
The BIOS chip in the system board contains the Service Tag, which is also visible on a barcode label on the bottom of the computer. The replacement kit for the
system board includes media that provides a utility for transferring the Service Tag to the replacement system board.
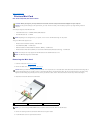
Removing the System Board Assembly
1. Follow the instructions in Before You Begin.
2. Remove memory module(s) (see Removing Memory Module(s)).
3. Remove the hard drive (see Removing the Hard Drive).
4. Remove the Mini-Card (see Removing the Mini-Card).
5. Remove the processor thermal-cooling assembly (see Removing the Processor Thermal-Cooling Assembly).
6. Remove the processor (see Removing the Processor Module).
7. Remove the center control cover (see Removing the Center Control Cover).
8. Remove the keyboard (see Removing the Keyboard).
9. Remove the display assembly (see Removing the Display Assembly).
10. Remove the palm rest (see Removing the Palm Rest).
11. Remove the optical drive (see Removing the Optical Drive).
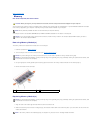
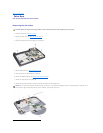
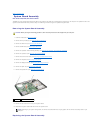
12. Remove the four screws from the top of the system board.
13. Disconnect the system board cable and remove the system board.
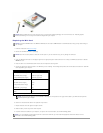
Replacing the System Board Assembly
CAUTION: Before you begin the following procedure, follow the safety instructions that shipped with your computer.
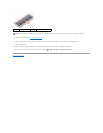
1
screws (4)
2
system board connector
NOTE: Depending on your system configuration, the number of screws shown here may be greater than the number of screws present in your
computer.