


162 Removing and Installing Parts
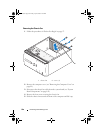
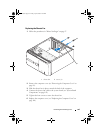
System Board
Removing the System Board
CAUTION: To guard against electrical shock, laceration by moving fan blades, or
other unexpected injuries, always unplug your computer from the electrical outlet
before opening the cover.
CAUTION: The heat sink assembly, power supply, and other components may be
very hot during normal operation. Be sure that they have had sufficient time to cool
before you touch them.
NOTICE: Before touching anything inside your computer, ground yourself by
touching an unpainted metal surface, such as the metal at the back of the
computer. While you work, periodically touch an unpainted metal surface to
dissipate any static electricity that could harm internal components.
1
Follow the procedures in "Before You Begin" on page 97.
2
Remove the computer cover (see "Removing the Computer Cover" on
page 99).
3
Remove any add-in cards on the system board (see "Cards" on page 111).
4
Remove the processor and heat sink assembly (see "Processor" on
page 145).
5
Remove the memory modules (see "Removing Memory" on page 111) and
document which memory module is removed from each memory socket so
that the memory modules can be installed in the same location after the
board is replaced.
6
Disconnect all cables from the system board. Note the routing of all cables
as you remove them so that you can re-route them correctly after installing
the new system board.
7
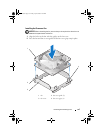
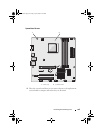
Remove the eight screws from the system board.
8
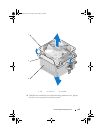
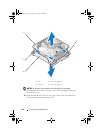
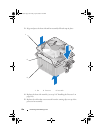
Lift the system board up and out.
book.book Page 162 Friday, April 4, 2008 12:10 PM