Dell UPS Site Preparation Guide, EMEA (230V) Revision 2, December 2012
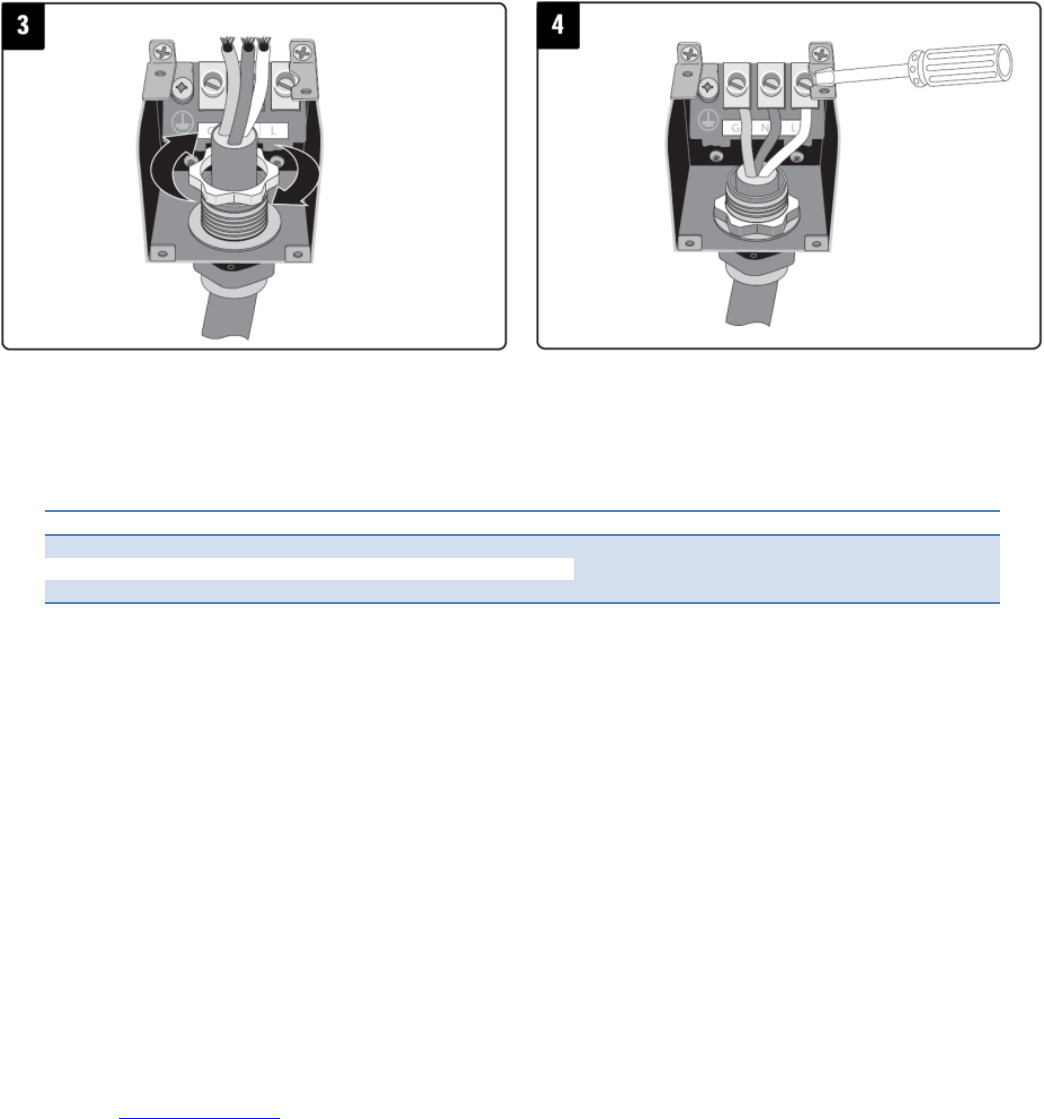
Step 3: Thread the input cord through the UPS back-
plate and secure with the plastic stuffing gland. Ensure
you leave enough free cord to connect to the UPS
terminals.
Step 4: Secure the bare cable ends to the UPS terminals
& replace the cover-plate.
Wire Colour
Terminal Position
UPS Wire Function
Terminal Wire Size Rating
Tightening Torque
Green/Yellow Stripe
G
Input Ground
5.26-16mm
2
(10-6AWG)
2.26Nm
(20 lb in)
Blue
N
Neutral In
Brown
L
Line (Live) In
Receiving the Dell UPS
Inspecting the Equipment
If any equipment has been damaged during shipment, keep the shipping cartons and packing materials for the
carrier or place of purchase and file a claim for shipping damage. If you discover damage after acceptance, file a
claim for concealed damage.
To file a claim for shipping damage or concealed damage: 1) File with the carrier within 15 days of receipt of the
equipment; 2) Send a copy of the damage claim within 15 days to your service representative.
NOTE: Check the battery recharge date on the shipping carton label. If the date has passed and the batteries were
never recharged, do not use the UPS. Contact your service representative.
Unpacking the Dell UPS
Remove all parts before beginning the installation. For a complete list of “what’s in the box” either refer to the user
guide or visit www.dellups.com -> Configure UPS –> List All UPS -> Your model.
Note that for some Dell UPS models the rack-mount rails may be packed below the UPS in the box.
CAUTION: Refer to the user guide for complete instructions including important Health & Safety advice.
CAUTION: This equipment is heavy; refer to the user guide for advice on unpacking and safe installation.


