


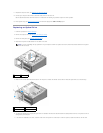
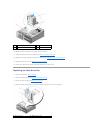

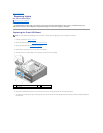


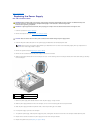

10. To replace the front I/O panel, align the screw holes on the front I/O panel with the screw holes on the chassis, and replace the two screws.
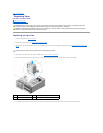
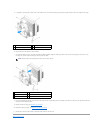
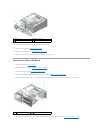
11. Align the securing tabs on the front panel with the corresponding slots on the chassis and connect the FRONT_LED cable to the front panel.
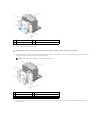
12. Rotate the front panel towards the computer until it snaps into place.
13. Replace the drive panel (see Replacing the Drive Panel)
14. Connect the cables to the front I/O panel.
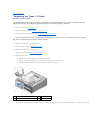
15. Replace the card fan cage (see Replacing the Card Fan).
16. Connect all the cables to the master I/O board (see Master I/O Board Components).
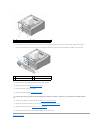
17. Replace any expansion cards that you removed (see Installing PCI and PCI Express Cards).
18. Replace the computer cover (see Replacing the Computer Cover).
19. Connect your computer and devices to electrical outlets, and then turn them on.
Back to Contents Page
1
screws (2)
2
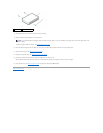
front I/O panel
1
front panel
2
FRONT_LED cable
3
securing tabs (4)
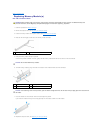
CAUTION: Ensure that you replace all the cables originally connected to the master I/O board or your computer may not function properly.