Stacking Dell Force10 MXL 10/40G Switches
20
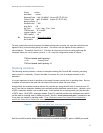
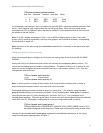
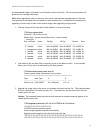
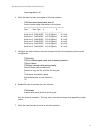
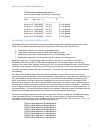
FTOS#show boot system stack-unit all
Current system image information in the system:
=============================================
Type Boot Type A B
----------------------------------------------------------------
Stack-unit 0 FLASH BOOT 8.3.15.0 8-3-16-0[boot]
Stack-unit 1 FLASH BOOT 8.3.15.0 8-3-16-0[boot]
Stack-unit 2 FLASH BOOT 8.3.15.0 8-3-16-0[boot]
Stack-unit 3 FLASH BOOT 8.3.15.0 8-3-16-0[boot]
Stack-unit 4 FLASH BOOT 8.3.15.0 8-3-16-0[boot]
Stack-unit 5 FLASH BOOT 8.3.15.0 8-3-16-0[boot]
Un-stacking (removing member units)
Minimizing traffic flow interruptions is always the primary goal when removing member units from a
stack. Four possible scenarios pertaining to unstacking or removing a member unit are:
1. Intentionally reducing the size of a ring topology stack
2. Intentionally reducing the size of a daisy-chain topology stack
3. Removing or replacing a failed member unit on a ring topology stack
4. Removing or replacing a failed member unit on a daisy-chain topology stack
Removing a unit from a ring topology is easy because of the built-in redundancy of the stack.
Eliminating links (intentionally or from failure) between any two members simply turns the ring
topology into a daisy-chain topology, allowing all traffic to continue through the stack. After physically
removing a stack member, simply connect the two sets of stack ports on the two switches that were
previously attached to the switch that was removed. The stack will resync while regaining a resilient
ring topology.
On a daisy-chain topology stack, after physically removing an end member unit (one that is only
connected to one other member), there is nothing else to do. However, when removing a member unit
from the middle of a daisy-chain stack, there are a few additional steps required to prevent a split
stack. A split stack occurs on a daisy-chain topology when any link (or switch) in the middle of the
stack fails or is removed. The side of the split that has the Master will remain intact, while the side of
the split with no Master will detect its Master is lost and therefore re-elects a new Master. When this
occurs it leaves two stacks. Both stacks now share the same IP address which will cause problems if on
the same network. To prevent stack split issues on the network, disconnect one of the stacks from the
network and reconfigure the stack to a new IP address using the Master console port.
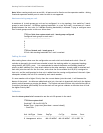
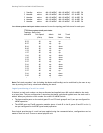
To remove stacking configurations and return to individual switches, unplug the stacking cables going
to the switch(es) that are to be unstacked. From the console prompt of a switch that has been
unplugged, run all or a subset of the following commands in config mode. Use the chart in Figure 3 on
page 7 to find the stack-group that correlates with each port:
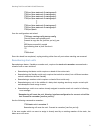
FTOS(conf)#no stack-unit 0 stack-group 0
FTOS(conf)#no stack-unit 0 stack-group 1
FTOS(conf)#no stack-unit 0 stack-group 2
FTOS(conf)#no stack-unit 0 stack-group 3
FTOS(conf)#no stack-unit 1 stack-group 0
FTOS(conf)#no stack-unit 1 stack-group 1
FTOS(conf)#no stack-unit 1 stack-group 2
FTOS(conf)#no stack-unit 1 stack-group 3


