


2
Contents
Dynex DX-WGPNBC or
DX-WGPDTC Wireless LAN
Card
Contents
Introduction..................................................................................... 2
Installing the software and hardware .............................................. 2
Configuring the wireless network .................................................... 3
Troubleshooting............................................................................... 6
Legal notices.................................................................................... 7
Français ....................................................... 8
Español ...................................................... 15
Introduction
Thank you for purchasing a Dynex Wireless LAN 802.11g Enhanced
notebook or desktop card. This package contains:
• A Wireless LAN 802.11g Enhanced notebook or desktop card
• A printed user guide
• A CD containing the wireless network card utility and drivers and
this user guide
If anything is missing, contact Dynex at (800) 305-2204.
Installing the software and
hardware
Use the following procedures to set up your wireless network.
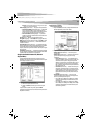
To install wireless networking on a Windows XP computer:
Caution: Do not insert the notebook or desktop card until instructed to do
so.
1 Install the access point. For more information, see the access point
documentation.
2 Turn on your computer.
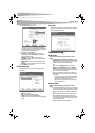
3 Insert the included CD in the optical drive.
4 If the installation program does not start automatically, use
Windows Explorer or My Computer to browse the CD and locate
the file named setup.exe, then double-click setup.exe to start
installing the software.
5 Follow the on-screen instructions to install the software.
6 If you are installing a desktop card, turn off your computer, install
the card, then turn on your computer again. The Found New
Hardware Wizard opens.
-OR-
Insert your notebook card into the appropriate slot in your
notebook. The Found New Hardware Wizard opens.
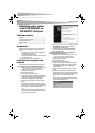
7 Click Install the software automatically (Recommended),
then click Next.
8 If a warning box opens, click Continue Anyway. Your computer
copies files to your hard drive.
9 Click Finish.
To install wireless networking on a Windows 98, Windows 2000, or
Windows ME computer:
Caution: Do not insert the notebook or desktop card until instructed to do
so.
1 Install the access point. For more information, see the access point
documentation.
2 Turn on your computer.
3 Insert the included CD in the optical drive.
4 If the installation program does not start automatically, use
Windows Explorer to browse the CD and locate the file named
setup.exe, then double-click setup.exe to start installing the
software.
5 Follow the on-screen instructions to install the software.
6 If you are installing a desktop card, turn off your computer, install
the card, then turn on your computer again. The Found New
Hardware Wizard opens.
-OR-
Insert your notebook card into the appropriate slot in your
notebook. The Found New Hardware Wizard opens.
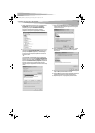
7 Right-click on the My Computer desktop icon, click Properties,
then click Hardware Device Manager. Make sure that the card is
listed as one of the devices in your computer.
DX-WGPNBC_WGPDTC_Combo.fm Page 2 Thursday, June 22, 2006 12:31 AM