


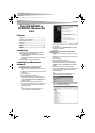


Configuring the wireless network
5
Connecting to a network
To connect to a network:
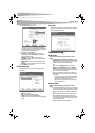
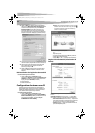
1 Click Connect on the Available Networks tab. The following screen
opens.
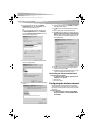
2 Set the values of the following fields:
• Network Name—Type a name for the new profile.
• Network Type —Select from the list of supported network
types. Supported types include:
• Peer to Peer—This is the 802.11g Enhanced peer-to-peer
mode (also known as Ad Hoc). Only one wireless cell is
supported for each different SSID. All communication is done
from client to client without the use of an access point.
802.11g Enhanced Ad Hoc networking uses the same SSID for
establishing the wireless connection.
• Access Point—This mode requires an 802.11g Enhanced or
802.11b access point. All communication is done through the
access point, which relays packets of information to other
wireless computers as well as to computers on a wired
network (such as Ethernet).
• Transfer Rate—The transmission rate at which the access point
transmits the data packets. You may set this to:
• fixed 1 Mbps, fixed 2 Mbps, fixed 5.5 Mbps, fixed 11 Mbps, or
Automatic if you are using an 802.11b access point.
• fixed 6 Mbps, fixed 9 Mbps, fixed 12 Mbps, fixed 18 Mbps,
fixed 24Mbps, fixed 36Mbps, fixed 48Mbps, fixed 54 Mbps,
or Automatic if you are using an 802.11g Enhanced access
point.
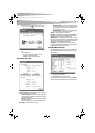
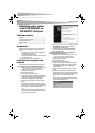
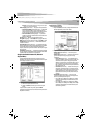
3 Click Next. The following screen opens.
4 Set the values of the following fields:
• Authentication Mode—Use the default authentication mode.
• Encryption—Use the default encryption.
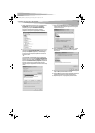
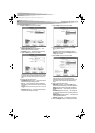
5 Click Next. The following screen opens.
When encrypted information is received it is only accepted if it
decrypts correctly. This happens only if the computer has the WEP
Key used by the access point. This screen lets you enter the WEP
key.
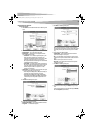
6 Set the values of the following fields:
• Input Method—Select the input method that matches the
input method used by the access point.
• Key—Enter the WEP Key. This key must be the same as the key
used by the access point. It must be between 8 and 63 characters
long.
Note: Use only the digits 0-9 and letters A-F for the key.
• Key Index—Select the key index that matches the key index
used by the access point.
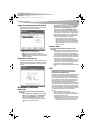
7 Click Next. The following screen opens.
8 If you want to set the IP setting, click Enable, then go to step 9.
-OR-
If you want the IP setting to be set up automatically, click Disable,
then click Complete. You are finished.
DX-WGPNBC_WGPDTC_Combo.fm Page 5 Thursday, June 22, 2006 12:31 AM