


6
Troubleshooting
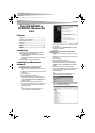
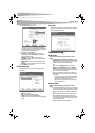
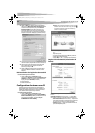
9 Click Next. The following screen opens.
The purpose of this screen is to configure the TCP/IP setting of
each wireless connection. You must define if the current profile’s IP
setting is assigned by a DHCP server or assigned by a fixed IP that
is determinate by the Network Administrator.
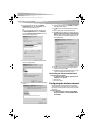
10 Set the values of the following fields:
• DHCP Status—Select Enable if the TCP/IP information is
assigned by a DHCP Server. Select Disable if you would like to
specify the IP address manually.
• IP Address—Enter the IP address for the network card.
• Subnet Mask—Enter the subnet mask for the network card. The
default is 255.255.255.0
• Default Gateway—Enter your network’s default gateway’s IP
address.
• DNS Server—Enter the domain name system server’s address.
11 Click Complete. You are finished.
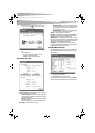
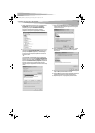
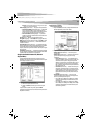
Profile Setting tab
The Profile Setting tab lets you create profiles for different network
environments.
On this tab, you can click the following buttons:
• Add to create new profile.
• Edit to edit the currently highlighted profile.
• Delete to delete the currently highlighted profile.
• Connect to connect to a network using the currently highlighted
profile.
About tab
The About tab shows the product version including details of the driver,
application, and firmware versions. You must use this version number
when reporting problems to Dynex.
Troubleshooting
Windows 98
To make sure that the WLAN 802.11g Enhanced device is installed
properly:
1 Click Start, Settings, Control Panel, then Network. Click the
Configuration tab. If you find the WLAN 802.11g Enhanced card
listed, it means the card is installed properly. If you see a yellow
question mark, it means there is a resource conflict.
-OR-
Right-click on the My Computer desktop icon, then select
Properties. Click Device Manager, then click on Network
Adapter. If you find the WLAN 802.11g Enhanced card listed, it
means the card is installed properly. If you see a yellow question
mark, it means there is a resource conflict.
2 Click on the card and then on the card service. You will see the
status of the card. If there is a yellow sign either on the card, check
the following:
• Check to see if your computer has a free IRQ. Free an IRQ by
assigning the same IRQ to some devices. For example COM 1
and COM 2 can be assigned the same IRQ values.
• Make sure that you have inserted the correct card and have
installed the correct driver.
Windows 2000
To make sure that the WLAN 802.11g Enhanced device is installed
properly:
1 Use Windows 2000 Diagnostics to see if there is any conflict in the
resource allocation of the I/O Address or IRQ allocations. If you find
that the IRQ or I/O Addresses are already assigned to other devices,
you must change that value. The I/O Address must be 40h bytes
long.
2 Go to the Control Panel. Double-click on the card and view the
WLAN card. Double-clicking on the card shows you the card
information, driver name, and the driver file. If you do not find the
names, there are some problems and the driver is not installed
correctly. Reinstall the driver.
3 Check the PnP BIOS setup menu, then click No.
DX-WGPNBC_WGPDTC_Combo.fm Page 6 Thursday, June 22, 2006 12:31 AM