DESIGN Brick 70™
©Elation Professional, Los Angeles Ca. 9 www.ElationLighting.com
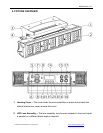
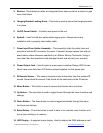
3. Bracket– This bracket provides an intergraded floor base as well as a means to pipe
mount the fixture.
4. Hanging Bracket Locking Knob – This knob is used to secure the hanging bracket
in to place.
5. On/Off Power Switch – Controls main power to the unit.
6. Eyebolt – Use this bold as a safety-cable rigging point. Always secure any
installation with a properly rated safety-cable.
7. Power Input/Fuse Holder Assembly – This assembly holds the safety fuse and
provides a female IEC connector for power. If needed, always replace fuse with an
exact match unless otherwise specified by an Elation Service Technician. Using a
fuse other than that specified could damage the unit and will void your warranty.
8. Power Output Jack – Use this jack to jump power to another Design LED fixtures.
Never have more than four LED fixtures jumped together via this power jack.
9. IR Remote Sensor – This sensor receives control information from the optional IR
remote. Never block this sensor if the fixture will be controlled via the IR remote.
10. Menu Button – This button is used to access the fixtures menu functions.
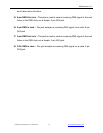
11. Up Button – The up button is used to toggle forward through the menu functions and
settings.
12. Down Button – The down button is used to toggle backwards through the menu
functions and settings.
13. Enter Button – The enter button is used to enter in to a certain menu function or to
lock a menu setting in to memory.
14. LED Display – 4-segment menu display. Used to display the DMX address as well


