


CHAPTER 2:
INSTALLATION
Page 10
BRIM-E6 USER’S GUIDE
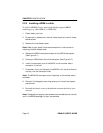
2.2.2 Installing a BRIM in a Hub
To install a BRIM-E6 into a stand-alone hub that supports BRIM
technology (e.g., MicroMMAC or NBR-620):
1. Power-down your hub.
2. Disconnect all cables from the hub. Note the ports to which these
cables attach.
3. Remove the hub chassis cover.
Note:
Refer to your specific hub documentation for instructions on
removing the hub chassis cover.
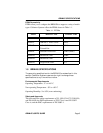
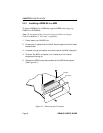
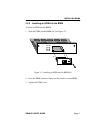
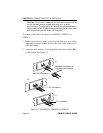
4. Remove the BRIM coverplate screws and the BRIM coverplate.
(See Figure 2-1.)
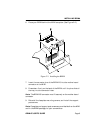
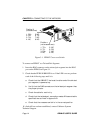
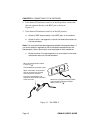
5. Place your BRIM behind the hub face plate. (See Figure 2-2.)
6. Insert the connector pins of the BRIM into the mother board
connector in the hub.
7. Press down firmly on the back of the BRIM until the pins slide all
the way into the connector holes.
Note:
The BRIM-E6 connector must fit securely on the mother board
connector.
8. Reinstall the faceplate mounting screws, and install the support
post screws.
9. Reattach the chassis cover to the hub and reconnect the hub to your
network.
Note:
Faceplate and support post screws are provided both on the hub
and in the BRIM package, for your convenience.