


4.1.4 Platen Gap Adjustment
This adjustment is required after you have removed the carriage unit from the main unit or replaced the
carriage unit. Adjust the distance between the printhead nose and the paper surface to 1.18 mm.
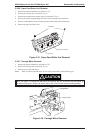
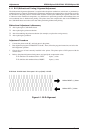
1. Remove the upper case, and place a thickness gauge (commercially available) on the paper guide plate at
the adjustment position on the left side of the printer, as shown in the figure below:
2. Move the carriage unit manually onto the thickness gauge.
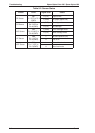
Table 4-2. Gap and Adjustment Direction
Gap between Head Nose
and Gauge Surface
Move
Left Bushing
Move
Right Bushing
Too narrow Clockwise (CW) Counterclockwise (CCW)
Too wide Counterclockwise (CCW) Clockwise (CW)
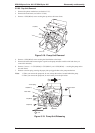
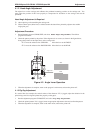
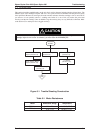
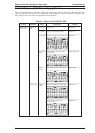
3. Rotate the parallelism adjustment bushing, attached to the left and right ends of the carriage guide shaft
until the black or color printhead contacts the thickness gauge.
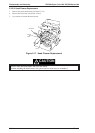
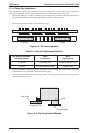
4. After placing the printheads against the gauge surface, verify the gap between the carriage flag and the
front frame. (See Figure 4-4.)
1.18 mm 1.18 mm
Figure 4-3. PG Lever Operation
Front Frame
Carriage Flag
Head
Thickness Gauge
Figure 4-4. Gap Confirmation Method
Adjustments EPSON Stylus COLOR 200 / EPSON Stylus 200
4-4 Rev. A