


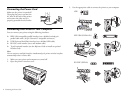
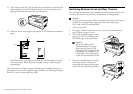


14 Switching Between Front and Rear Tractors
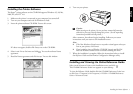
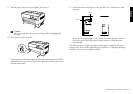
11. Turn on the printer if it is off. You hear the print head move to the left and
Ready appears on the LCD. Either the front or rear Tractor Select arrow
lights up to indicate the tractor that was selected last.
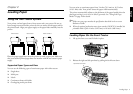
12. If the rear tractor arrow light is red, press the
LF/FF Load button to load the
paper.
If the front tractor arrow light is red, press the
Front/Rear button to switch
to the rear tractor. When the printer switches tractors, it loads the paper
automatically.
The rear tractor arrow light turns green and the paper is loaded to the top-of-
form position. If you need to adjust the paper position, see “Adjusting the Paper
Position” in your on-screen Reference Guide.
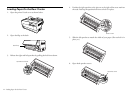
Switching Between Front and Rear Tractors
You can easily switch between paper loaded on the front and rear tractors, and
vice-versa. Just wait for any print jobs to finish before switching tractors.
c
Caution:
Never switch between tractors if labels are loaded in the printer. First remove
the labels by tearing off the fresh supply below the tractor and pressing
LF/FF Load to eject the remaining labels.
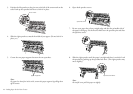
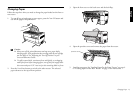
1. Turn on the printer.
2. If no paper is loaded in the front or rear tractor, load it as described on
page 9 (front) or page 12 (rear).
3. To tear off any printed pages or excess
paper, press the
Tear Off button and
tear off the pages at the perforation.
c
Caution:
Always tear off the printed
document and any excess paper
before switching tractors. If the
perforation does not align with the
tear-off edge, you can adjust it. See
“Adjusting the Tear-Off Position”
in your on-screen Reference Guide.
4. Press the
Front/Rear button to switch
to the other tractor. The selected
tractor light turns green and the paper
advances to the top-of-form position.
front
rear