


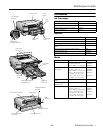

EPSON Stylus Pro 5500
12 -
EPSON Stylus Pro 5500
2/01
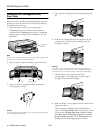
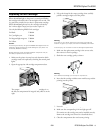
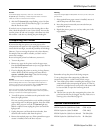
Loading Paper in the Optional Lower Tray
Always pull the paper tray completely out of the lower paper
cassette before you insert paper.
Note:
If you use paper longer than letter size in the lower tray, pull out the
tray and cover extensions of the upper paper tray, so your printouts
will be supported when they come out of the printer.
To print on paper in the lower tray, select
Paper Tray (Lower)
or
Auto Select
in your printer software before you send the
print job.
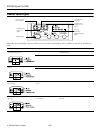
Cleaning the Print Head
If your printed image is unexpectedly light or faint or dots are
missing from the image, you may need to run a cleaning cycle.
This unclogs the print head nozzles so they can deliver ink
properly.
The cleaning cycle uses ink, so you should run it only if print
quality declines. You can run a printer check or the Nozzle
Check utility to determine if the cleaning cycle has been
successful, or if you need to run it again.
There are two ways to run a cleaning cycle:
❏ Using the Head Cleaning utility in your printer software
(not available if you’re accessing the printer over a network)
❏ Using the printer’s control panel buttons
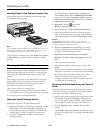
Using the Head Cleaning Utility
Follow these steps to run the Head Cleaning utility:
1. Make sure the printer is turned on but not printing, and the
Ink Out
light is off. If the
Ink Out
light is flashing or on,
you need to replace the ink cartridge(s)—indicated by the
H ink out lights—instead. See page 12 for instructions.
2. If you have an application running, access the printer
settings dialog box.
Or, with Windows, click
Start
, point to
Settings
, and
select
Printers
. Right-click the
EPSON Stylus Pro 5500
printer icon. Then select
Properties
(Windows 95, 98, or
2000),
Document Defaults
(Windows NT), or
Printing
Preferences
(Windows 2000).
3. Macintosh: Click the utility button.
Windows: Click the
Utility
tab.
4. On the Utility menu, click the
Head Cleaning
button.
5. Follow the instructions on the screen to clean the print
head. Cleaning takes about 90 seconds, during which the
printer makes some noise and the
P
Operate
light flashes.
Caution:
To avoid damaging the printer, never turn it off while the
P
Operate
light is flashing—unless the printer hasn’t moved or
made any noise for more than five minutes.
6. When the
P
Operate
light stops flashing, run a nozzle
check to confirm the print head nozzles are clean. Make
sure paper is loaded in the printer, then:
Macintosh: Click
Confirmation
, then click Next.
Windows: Click
Print nozzle check pattern
, then click
Print
.
The nozzle check pattern prints.
7. If the nozzle check pattern has no gaps in its dots, click
Finish
.
If the pattern is missing dots, click
Clean
to clean the print
head again. If you don’t see any improvement after cleaning
three or four times, check the solutions in your Printer
Guide. You can also turn the printer off and wait
overnight—this allows any dried ink to soften—and then
try cleaning the print head again.
Cleaning the Print Head Using the Control
Panel
Clean the print head using the control panel buttons if you’re
accessing the printer over a network or not using the EPSON
printer driver and utilities. Follow these steps:
1. Make sure the printer is turned on but not printing, and the
Ink Out
light is off. If the
Ink Out
light is flashing or on,
you need to replace the ink cartridge(s)—indicated by the
H ink out lights—instead. See page 12 for instructions.
2. Press the
Cleaning
button and hold it down for three
seconds.
The
P
Operate
light begins flashing, and the printer ejects
any paper in the paper path. The cleaning cycle takes about
90 seconds.