35
Only part of the picture is displayed, or the picture is distorted.
■ Press the Aspect button to select a different aspect ratio.
■ Use the Position setting in the Setting menu to reposition the image on the screen. See
page 22 for details.
The picture is trapezoid-shaped.
Press the and buttons on the projector to correct the problem.
The picture contains static or noise.
■ Make sure your cable is securely connected at both ends.
■ Don’t use an extension cable or a cable longer than 6 feet.
■ If you’re displaying the same image on your computer and projector screen, try turning
off your laptop’s LCD display.
The picture is blurry.
■ There may be dirt on the lens. Clean the lens as described on page 25.
■ Adjust the focus using the focus ring.
■ Make sure the lens is not fogged by condensation. If you’ve just moved the projector from
a cold environment, wait a couple of minutes before using it.
■ Adjust the Sharpness setting on the Image menu (see page 19). If you’re projecting
from a computer, you may also need to adjust the
Tracking and Sync settings.
You see vertical stripes, or the picture still looks blurry after trying the solutions in the
previous section.
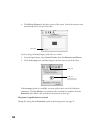
If you’re projecting from a computer, press the
Auto button on the remote control. This
optimizes the projector’s tracking and sync settings. If this doesn’t work, change the
Tracking
and
Sync settings in the projector’s Image menu.
The colors on the screen don’t look right.
■ Press the Color Mode button on the remote control to move through the different color
mode settings.
■ Adjust the following settings in the Image menu: Brightness, Contrast, Saturation
(video only),
Tint (video only), Color Temperature, and Flesh Tone. See page 19.
■ If the picture looks darker, you may need to replace the lamp.


