


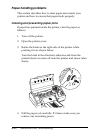

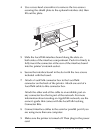
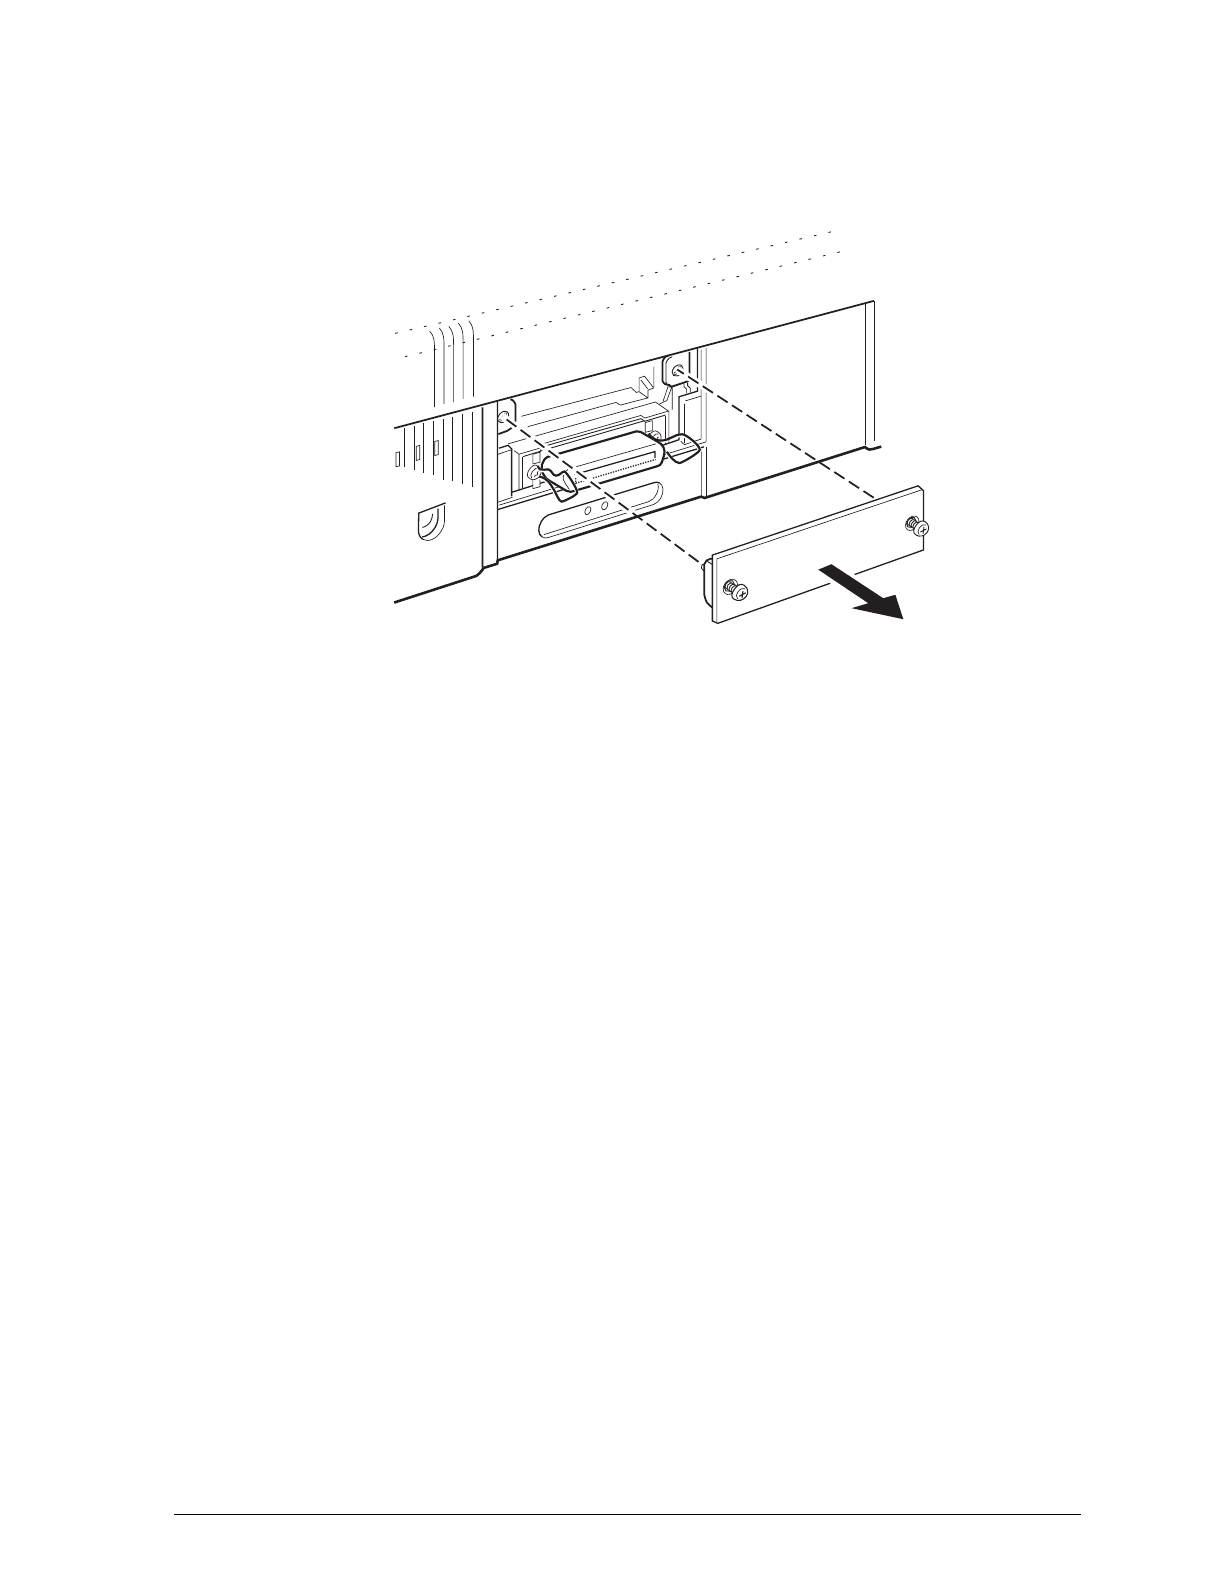
4. Use a cross-head screwdriver to remove the two screws
securing the shield plate to the optional interface slot; then
lift out the plate.
5. Slide the LocalTalk interface board along the slots on
both sides of the interface compartment. Push it in firmly to
fully insert the connector at the rear of the interface board
into the printer’s internal socket.
6. Secure the interface board in the slot with the two screws
included with the board.
7. Attach a LocalTalk connector box to the LocalTalk
connector on the back of the printer. Attach one end of a
LocalTalk cable to this connector box.
Attach the other end of the cable to an available port on
any connector box that is part of the network. For more
information about creating an AppleTalk network, see the
owner’s guide that comes with the LocalTalk Locking
Connector Kits.
8. Connect interface cables to the serial or parallel port if you
are using more than one computer.
9. Make sure the printer is turned off. Then plug in the power
cord.
Using the LocalTalk Interface
A-3