


Settings for Multiple Projectors
178
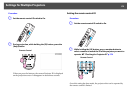
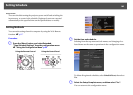
H Press the [h] button to correct the distortion.
To continue to correct another point, press the [Esc] button to re-
turn to the previous screen, then repeat steps 7 and 8.
q
• If you press the [Default] button while adjusting a point, the value of the
point that you are adjusting is reset to the default.
I When you are done, press the [Esc] button to exit the
correction menu.
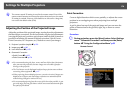
Checking the Color Mode
Set the Color Mode to Multi-Projection. s p.34
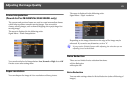
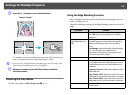
Using the Edge Blending Function
When multiple projectors are lined up and projecting images, you can
create a seamless screen.
Adjust the following settings on the Edge Blending menu to correct the
image.
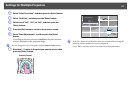
Remote Control
Sub Menu Function
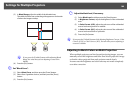
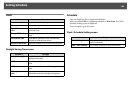
Edge Blending Set to On to activate the edge blending function.
Set to Off when not projecting from multiple
projectors.
Top Edge/Bottom
Edge/Right Edge/Left
Edge
Blending: Enable this setting on the sides of the
projected image you want to blend. A gradient
appears indicating the area where blending
occurs.
Blend Range: Adjusts the width of the blending
area. You can adjust the width down to
increments of one pixel at a time and you can
blend up to 45% of the image.
Blend Curve You can select from three gradients.
Black Level When projecting a dark image and the blended
area is brighter than the unblended area, correct
the unblended area to resolve the difference in
brightness.
Brightness Correct.: Adjust the brightness of the
unblended area.
Color Correct. (G/R): Adjust the color tone of the
unblended area to look more greenish or reddish.
Color Correct. (B/Y): Adjust the color tone of the
unblended area to look more bluish or yellowish.
Guide Display Set to On to display a line guide on the edge of the
blending area.