


IN1124/28/30 Transmission System • Installation and Operation
IN1124/28/30 Transmission System • Installation and Operation
Installation and Operation, cont’d
2-3
CAUTION
Installation and service must be performed by
authorized personnel only.
Installation Overview
To install and set up a TP transmitter/DA and the associated TP
receiver(s) for operation, perform the following steps:
1
Disconnect power from all of the equipment, including the
video source(s) (such as computers or HDTV set-top
boxes), the transmitter, the receivers, and the output
display(s).
2
If desired, mount the transmitter in a rack. See Rack
Mounting the Transmitter in this chapter.
3
If desired, mount the receivers under furniture or to the
desired flat surfaces. See Furniture Mounting the Receiver in
this chapter.
4
Connect the input to the transmitter. See Transmitter
cabling in this chapter.
5
Connect the local monitor to the transmitter. See
Transmitter cabling in this chapter.
6
Connect the cables between the transmitter and the TP
receivers. See Transmitted signal cabling in this chapter.
7
Connect the output cables from the receivers to the
displays. See Output cabling in this chapter.
8
Connect power supplies to the TP receivers and the TP
transmitter. Turn on the video source(s) and the output
display(s).
9
On each receiver, as necessary, adjust the sharpness
control. See Operation in this chapter.
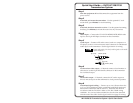
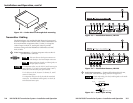
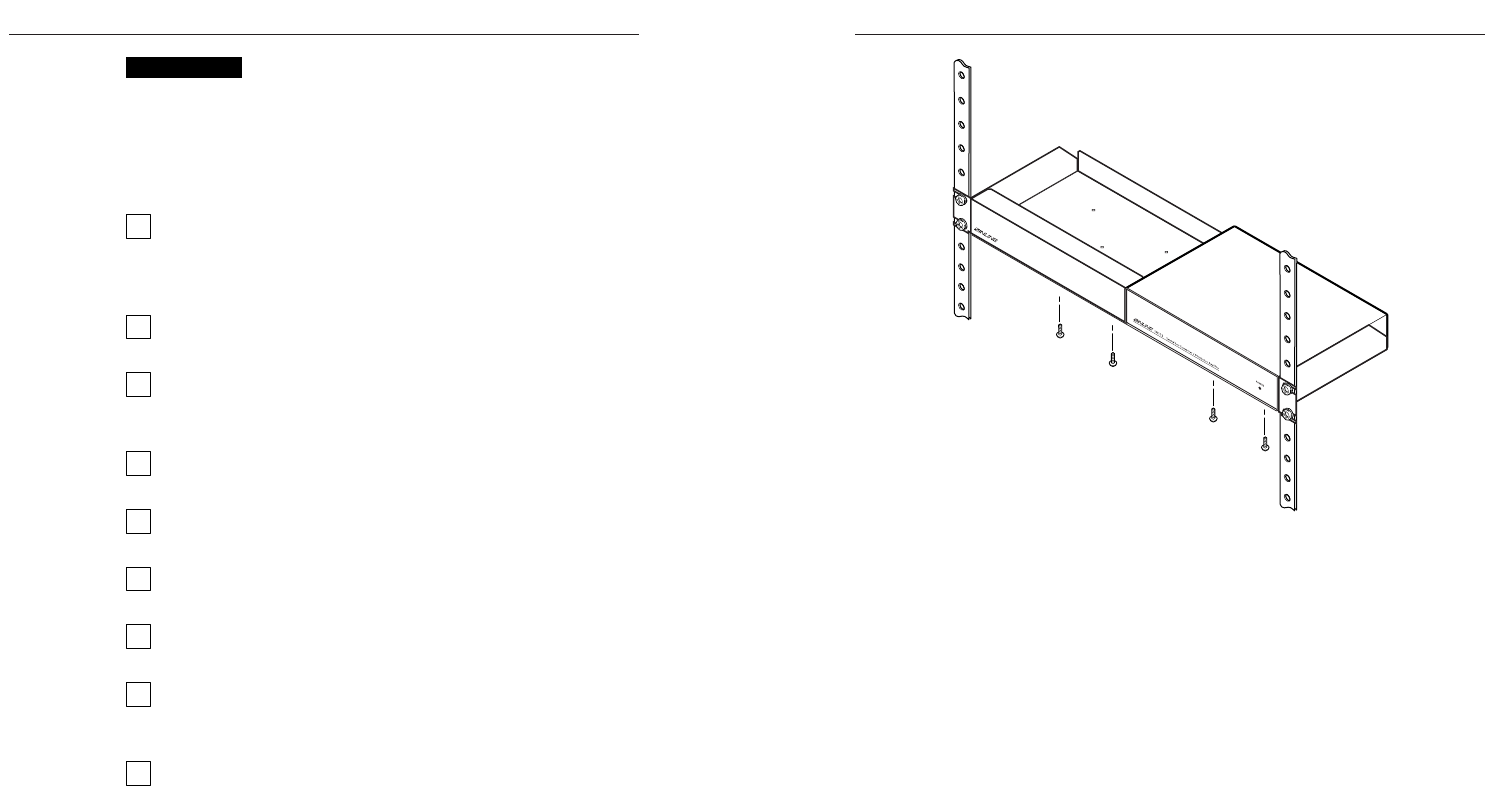
Rack Mounting the Transmitter
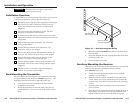
The transmitter can be mounted in a 19" equipment rack using
an optional Rack-mount shelf (part #IN9080) (figure 2-1). The
transmitter mounts on the left or right side of the rack.
1. If feet were previously installed on the bottom of the
transmitter, remove them.
2. Mount the transmitter on the rack shelf, using the two
provided #6-32 x 1/4 screws to secure the receiver to the
shelf.
2-2
6-32 x 1/4" Screws
Use 2 mounting holes
False Front panel
Use 2 mounting holes
4
Figure 2-1 — Rack mounting the IN1124
3. Install an optional IN9088B blank panel or another unit to
the rack shelf.
4. Insert the shelf into the rack, aligning the holes in the shelf
with those in the rack.
5. Secure the shelf to the rack.
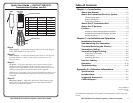
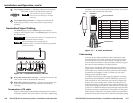
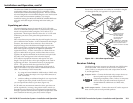
Furniture Mounting the Receiver
The receiver can be mounted under furniture or to any other flat
surface using optional mounting brackets for IN1130
(part #IN9089) (figure 2-2).
1. Attach the mounting brackets to the receiver with the
machine screws provided.
2. Hold the receiver with the attached brackets against the
surface where you want to mount the receiver. Mark the
location of the screw holes of the bracket on the mounting
surface.
3. Drill pilot holes in the mounting surface at the marked
screw locations.
4. Place the receiver against the surface and align the holes in
the brackets. Insert screws into the four pilot holes and
tighten all four screws to secure the receiver in place.
Installation and Operation