


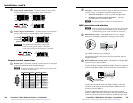
CrossPoint / MAV Matrix Switchers • Front Panel Operation
Front Panel Operation, cont’d
3-4
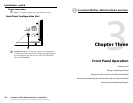
CrossPoint / MAV Matrix Switchers • Front Panel Operation
3-5
Refer also to the CrossPoint 450 Plus / MAV Plus User’s Manual at www.extron.com. Refer also to the CrossPoint 450 Plus / MAV Plus User’s Manual at www.extron.com.
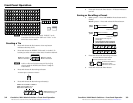
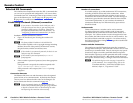
Setting the Front Panel Locks (Executive Modes)
The matrix switcher has three levels of front panel security lock
that limit the operation of the switcher from the front panel. The
three levels are:
• Lock mode 0 — The front panel is completely unlocked.
• Lock mode 1 — All changes are locked from the front
panel (except for setting Lock mode 2). Some functions
can be viewed.
• Lock mode 2 — Basic functions are unlocked. Advanced
features are locked and can be viewed only.
Basic features consist of:
m Making ties
m Saving and recalling presets
m Setting input audio gain and attenuation
m Changing Lock modes
Advanced features consist of:
m Setting video and audio output mutes
m Setting audio output volume
N
The switcher is shipped from the factory in Lock mode 2.
N
For a complete list of advanced features, refer to the
CrossPoint 450 Plus / MAV Plus User’s Manual,
available on the Extron DVD or at www.extron.com.
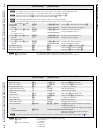
Selecting Lock mode 2 or toggling between
mode 2 and mode 0
N
If the switcher is in Lock mode 0 or mode 1, this procedure
selects mode 2.
If the switcher is in Lock mode 2, this procedure selects
mode 0 (unlocks the switcher).
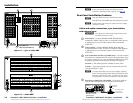
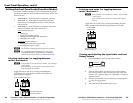
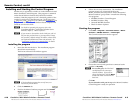
Toggle the lock on and off by pressing and holding the
Enter button, the Video button, and the Audio button for
approximately 2 seconds.
I / O
VIDEO AUDIO
ENTER
I / O
VIDEO AUDIO
ENTER
Press and hold simultaneously.
The buttons blink twice.
Release the buttons.
2 seconds
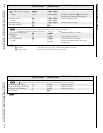
Selecting Lock mode 2 or toggling between
mode 2 and mode 1
N
If the switcher is in Lock mode 0 or mode 1, this procedure
selects mode 2.
If the switcher is in Lock mode 2, this procedure selects
mode 1.
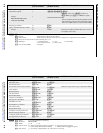
Toggle the lock on and off by pressing and holding the Video
button and the Audio button for approximately 2 seconds.
I / O
VIDEO AUDIO
I / O
VIDEO AUDIO
Press and hold
simultaneously.
The buttons blink twice.
Release the buttons.
2 seconds
Viewing and Adjusting the Input Audio Level and
Output Volume
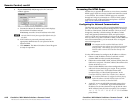
1. Press and hold the Audio button until it flashes.
AUDIO AUDIO
Audio button blinks.Press and
Hold
2 seconds
2. Press an input button (for input level) or output button
(for volume). Refer to the CrossPoint 450 Plus / MAV Plus
Switcher User's Manual, chapter 3, “Operation”, to read the
displayed value.
3
. Increase/decrease the level or volume by pressing the Esc
(
>
) and View (
<
) buttons.
4. Press and release the Audio button to exit.