


3-3MediaLink Switchers • Operation
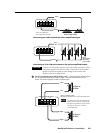
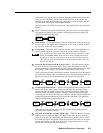
Audio and video signals can be switched separately (broken away from each
other) via the User Mode screen of the control software. If the signals are
switched separately, the LED above the audio input’s button blinks, and the
LED above the video input’s button lights steadily.
The labels above the LEDs can be replaced. See appendix B in this manual for
details.
3
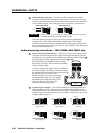
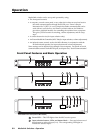
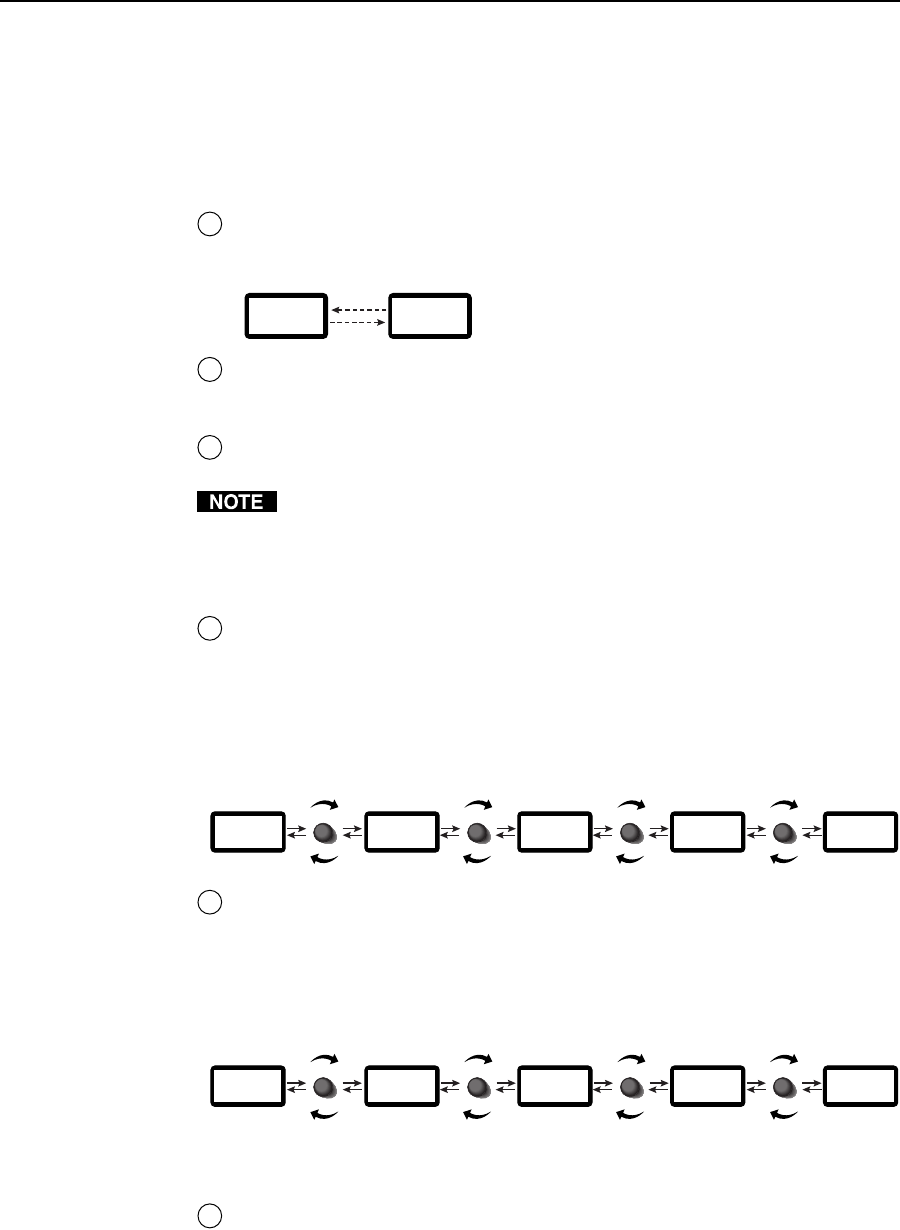
LCD— This two-row liquid crystal display provides a way to see the menus
and options for setting up the switcher. During regular operation the LCD
displays the following messages:
EXTRON
MLS 506
INPUT
#6
2 sec.
2 sec.
4
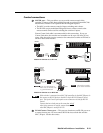
Menu button — Press this button to enter the setup menus and to move from
menu to menu. The Menu and Next buttons are also used to enable/disable
the executive mode. See the note below.
5
Next button — When the MLS’s setup menus are active, press this button to
enter a specific submenu or to move between options within a submenu.
Press the Menu and Next buttons simultaneously for three seconds to enable/
disable the executive mode. When executive mode is enabled, adjustments
and changes to switcher setup cannot be made from the front panel controls.
Only input selection and adjustments to overall volume and mixer levels are
allowed. See page 3-7.
6
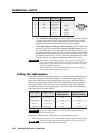
Mix knob (MLS 506 MA and MLS 506 SA only) — Turn this knob to adjust
the level of the Aux/Mix audio input. This control determines how much
gain or attenuation is applied to the Aux/Mix channel and, therefore, how loud
the auxiliary audio sounds. This knob has no function during setup.
There is no physical limit to this knob’s rotation. During mix level adjustment
the LCD screen displays the level (shown below), and also indicates when the
knob has reached its functional minimum (0) or maximum (100) limit.
MIX MIX MIX MIX
Mix
050
Mix
079
Mix
014
Mix
Min
Attenuation Gain
Mix
Max
7
Volume/Adjust(ment) knob — While in the regular operating mode, turn this
knob to adjust the master audio volume for the Audio Out preamp audio
outputs (and the amplified output on the MA and SA models). There is no
physical limit to this knob’s rotation. During volume adjustment the LCD
screen displays the level (shown below), and also indicates when the knob has
reached its functional minimum (0) or maximum (100) limit. The minimum
setting produces 100% signal attenuation.
VOLUME
ADJUST
VOLUME
ADJUST
VOLUME
ADJUST
VOLUME
ADJUST
Volume
050
Volume
086
Volume
007
Volume
Min
100%
attenuation
0%
attenuation
Volume
Max
When the setup menus are active, turn the Volume/Adjust knob to make
adjustments to switcher settings.
8
Clip LED (MLS 506MA and MLS 506SA only) — This LED flashes when the
audio level for a particular input is too high. If the audio level exceeds the
point at which the Clip LED flashes, the audio will be clipped, which results
in a distorted output. Adjust the output level of the active source or the input
level at the switcher (via the front panel LCD Audio Adjust menu or via the
control software) so clipping does not occur.