


Installation and
Operation
This section describes the installation and operation of the PowerCage MTP T 15HD RSA and
MTP R 15HD RSA SEQ, including:
• Installing the Boards into the PowerCage Enclosure
• Board Connections, LEDs, and Rear Panel Features
• PowerCage Front Panel Port, Control, and Indicators
• Board Setup and Operation
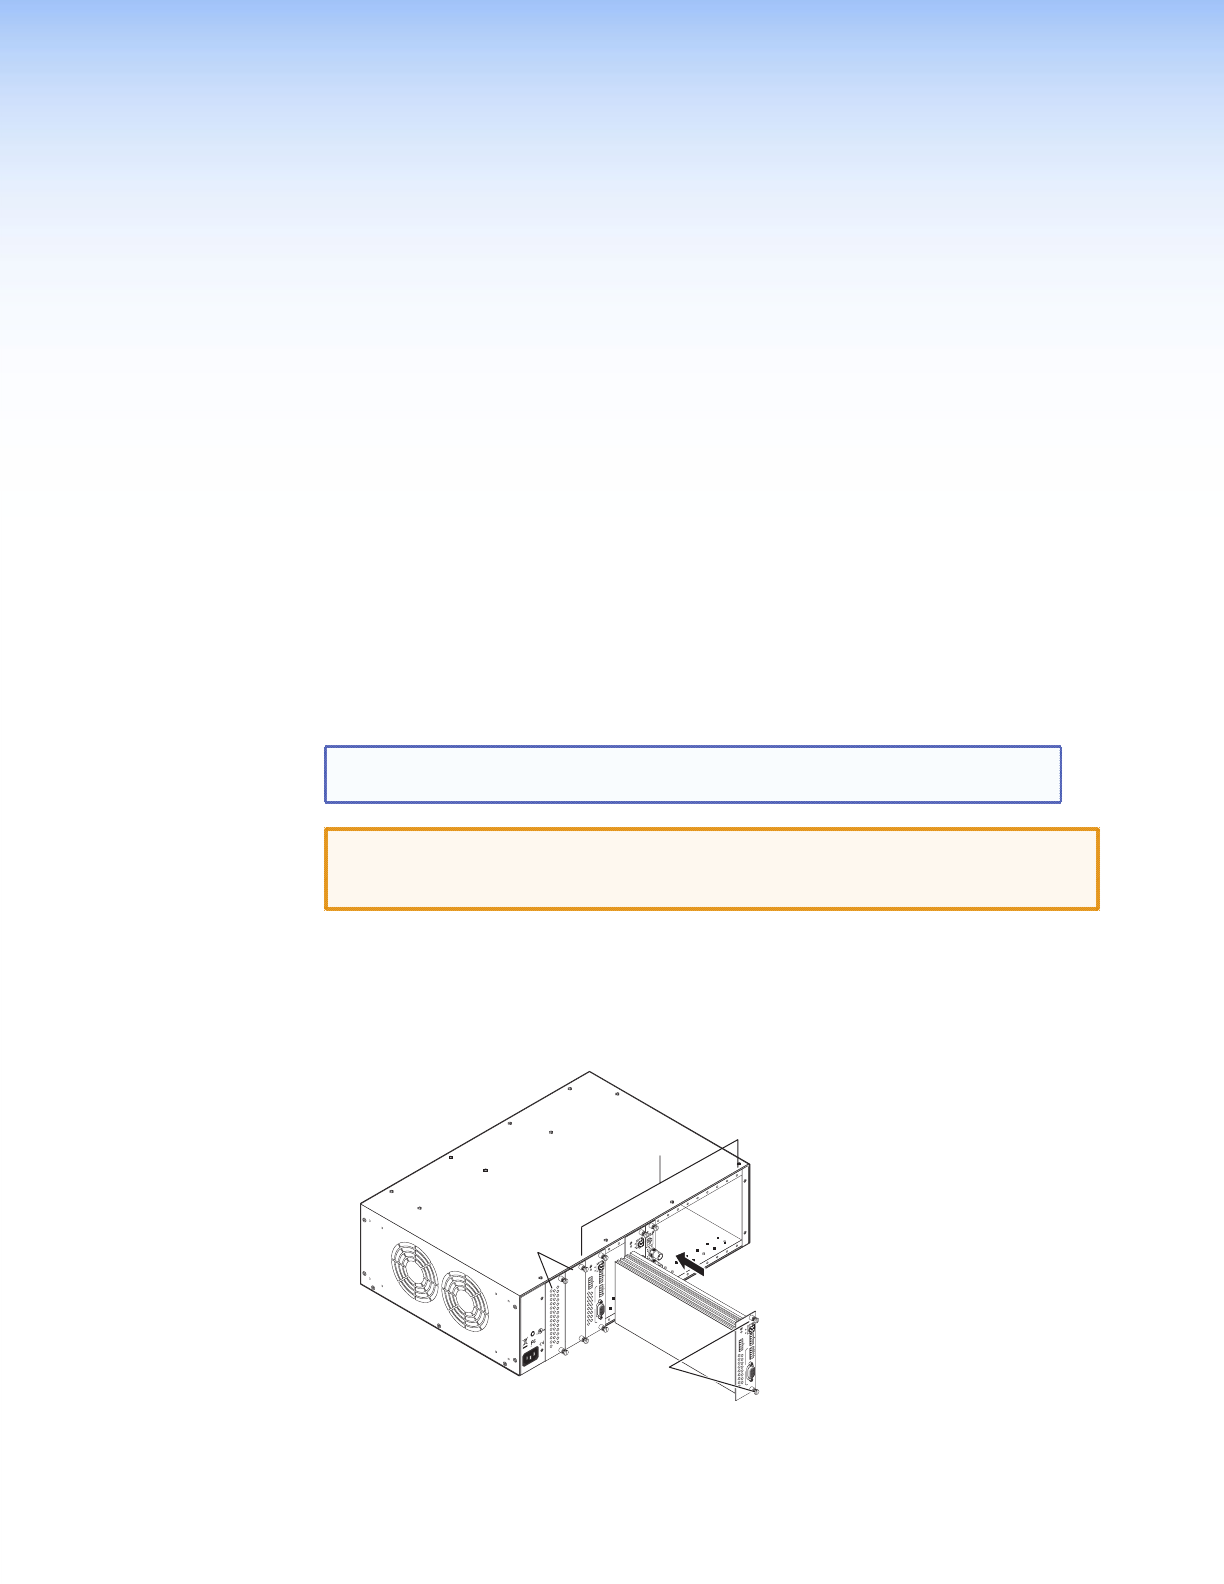
Installing the Boards into the PowerCage Enclosure
Up to 16 single slot or 8 dual slot input/output boards can be inserted into the PowerCage
enclosure. The PowerCage MTP T 15HD RSA transmitters are single slot boards, and
PowerCage MTP R 15HD RSA SEQ receivers are dual slot boards.
NOTES: The boards are hot-swappable; they can be installed or removed without
turning off or disconnecting the power to the PowerCage enclosure.
CAUTION: Use ESD precautions when installing a board to avoid damaging the board.
Keep the board in the anti-static bag until needed. Use proper grounding
techniques during installation..
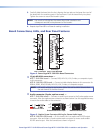
1. Where applicable, remove as many blank plates or previously installed boards from the
rear of the PowerCage as necessary for the number of new boards to be installed.
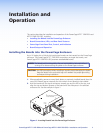
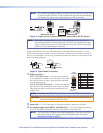
2. Hold the board with the signal connectors towards you and the LED at the top, and
align the top and bottom grooves of the board with the slide posts in the selected
enclosure slot. See the example in figure 1.
MONO
AUDIO OUTPUT
1 2
SHARP
GAIN
Y/VID
C
INPUT
PowerCage
MTP R AV
TxRx
HD/SDI INPUT HD/SDI OUTPUTS
MODE
PowerCage
FOX 3G HD-SDI
1 2
REMOTE
RS-232
RS-232
OVER FIBER
Tx Rx
Tx
ALARM
Rx
OUTPUT
RGB
PowerCage
FOX 4G RX RGB
Tx Rx
L R
AUDIO
5A MAX.
100-240V 50/60Hz
N15778
C
US
LISTED
1T23
I.T.E.
Screws
(2 per board)
1 2
REMOTE
RS-232
RS-232
OVER FIBER
Tx Rx
Tx
ALARM
Rx
OUTPUT
RGB
PowerCage
FOX 4G RX RGB
Tx Rx
L R
AUDIO
Align board and
slide into slot.
16 Available Single Board Slots or
8 Double Board Slots
Power
Supply
Figure 1. Inserting Boards into the PowerCage Enclosure
PowerCage MTP T 15HD RSA and PowerCage MTP R 15HD RSA SEQ • Installation and Operation 4